

Merry Christmas
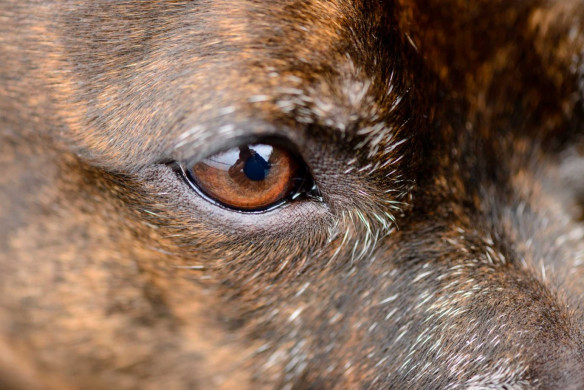
No holiday season would be complete without dressing up the dogs. Jammie is a Staffordshire Bull Terrier, and despite the look on her face is happy to be Santa's Little Helper. Cedric is a mix and is grumpy about the whole situation. He complies as he knows there are cookies involved for being a good dog.


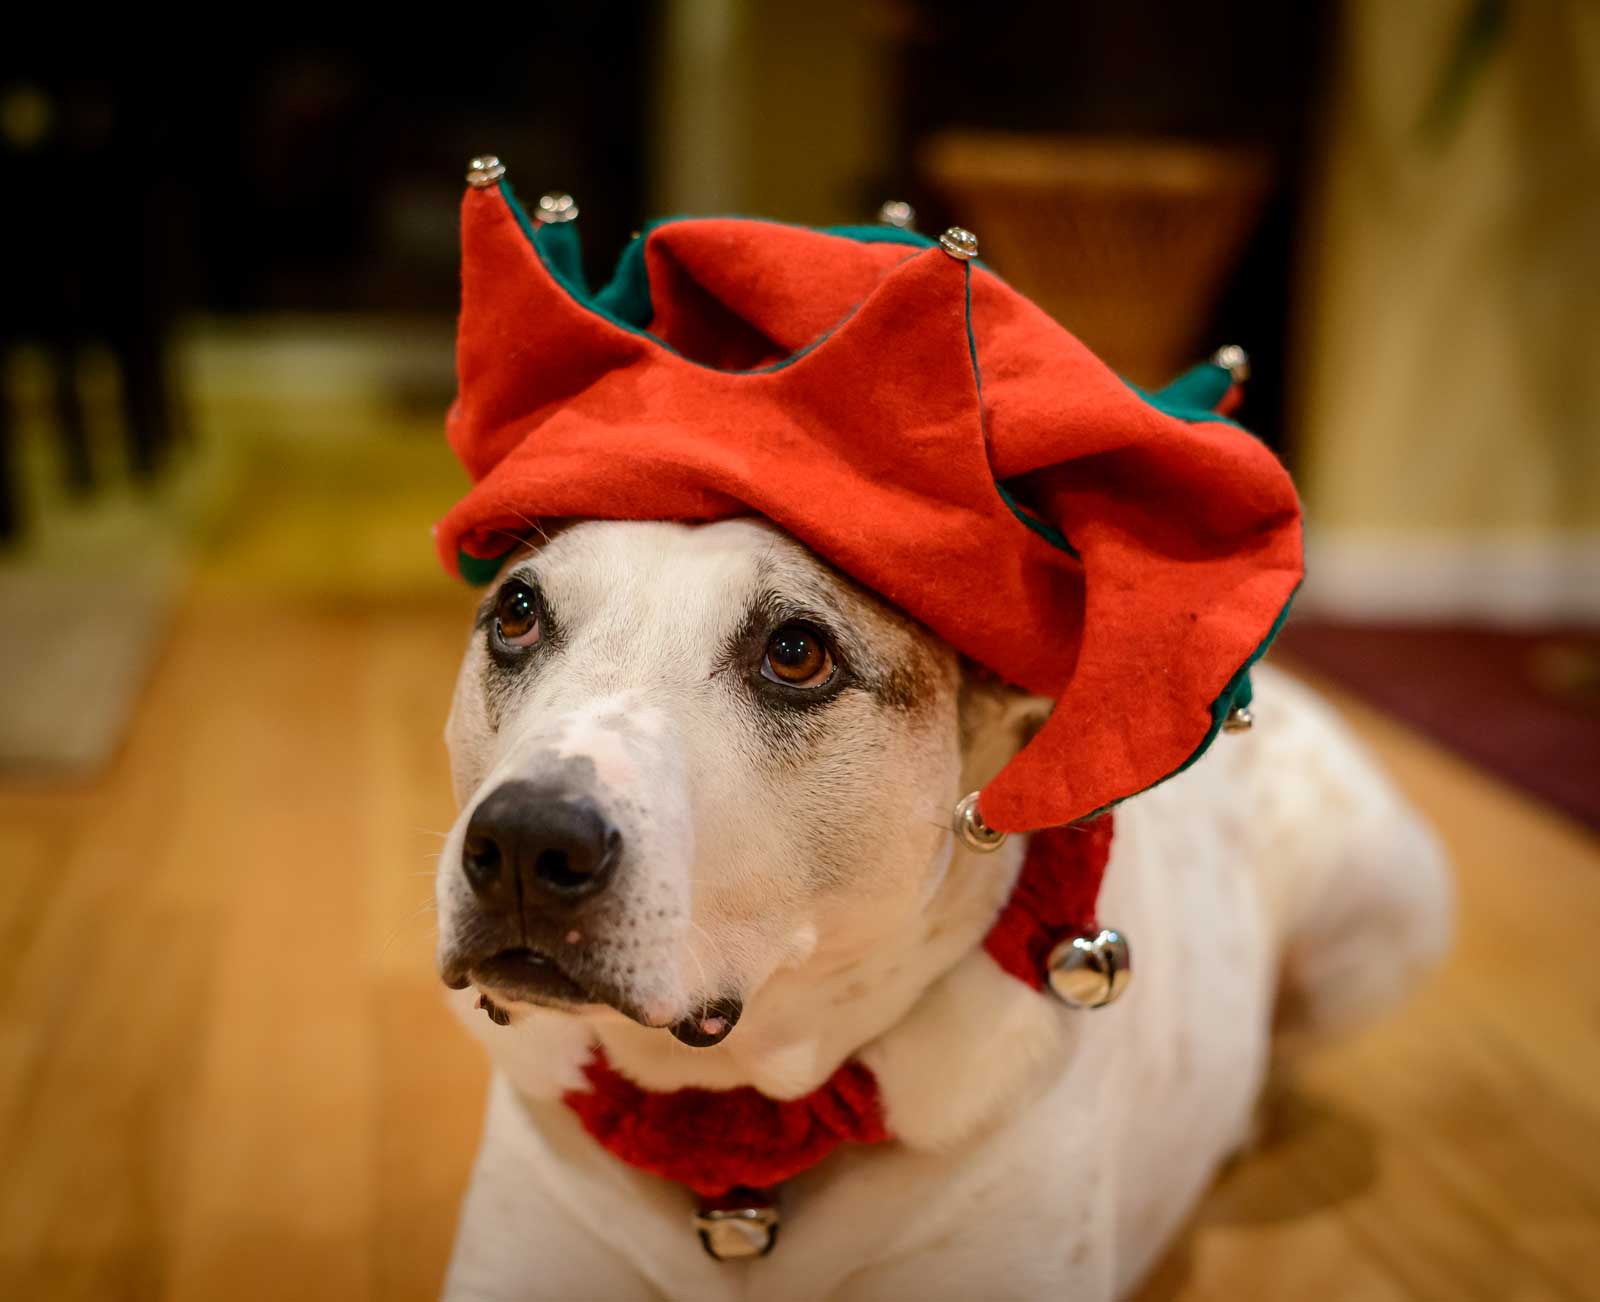
Shot in fairly low light with a Nikon D800, Nikkor 50mm f/1.8G lens at f/2.8, ISO3200, 1/100s. Processed in Lightroom and Photoshop.

Best of 2012
I took a look at my Google Analytics and thought I would show what my three most popular posts of 2012 have been. Not surprising that they are all photo gear related.
- Nikon D7000 vs D600 vs D800 : A Quick Comparison - Three cameras that photo enthusiasts are buying. Different price ranges, and performance but all fantastic cameras.
- Nikon D600 Vs Canon 6D - Entry Level Full Frame Scrap - Nikon and Canon both released entry level full frame cameras. Both will sell well, and nice to see that full frame is now becoming more affordable.
- Nikon D800 Contrast and Phase Detect Autofocus Testing - My early release D800 had the left side autofocus problems. I posted my test methodology and results, sent my camera to Nikon, but the saga is not yet over.
My most popular photo related post was Hiking the Binkert Trail To The Lions which covers a popular hike in Vancouver, BC. Thanks to everyone for visiting, and happy holidays.
Some of my favorite photos of 2012


Shelter Dogs Dec 14 2012
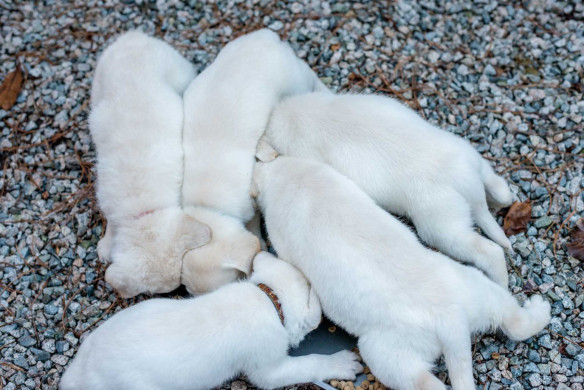
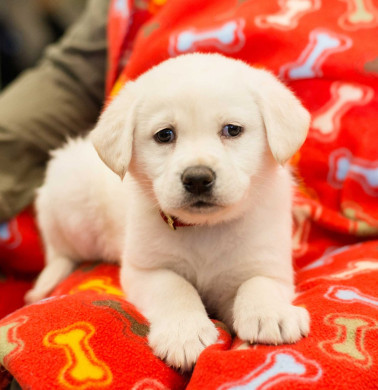
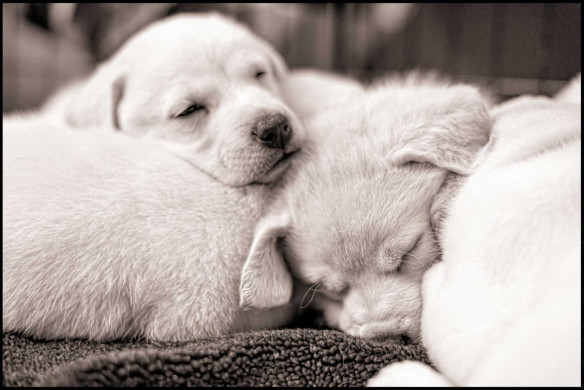
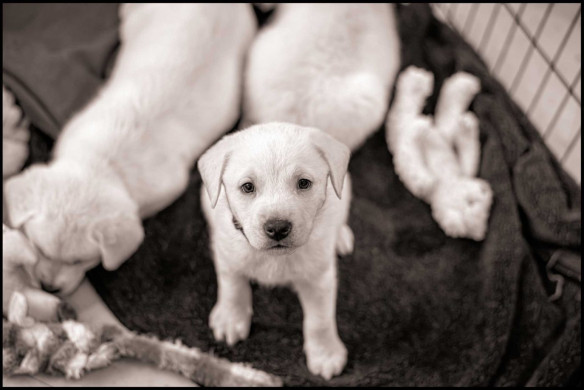
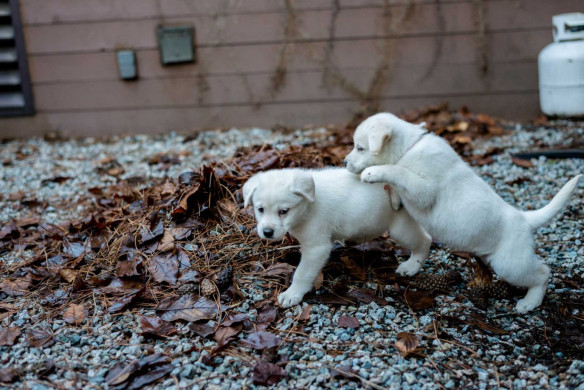
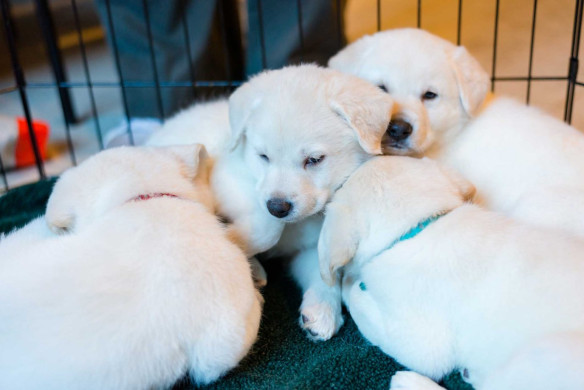
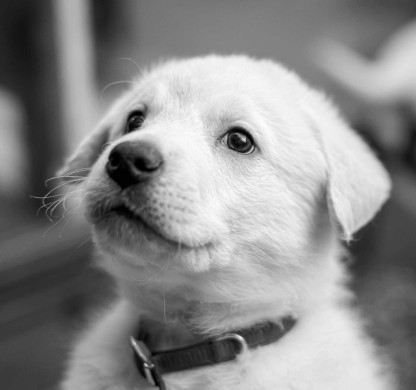
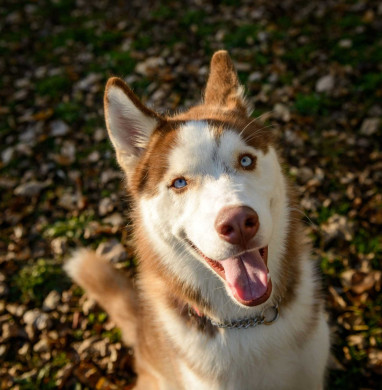
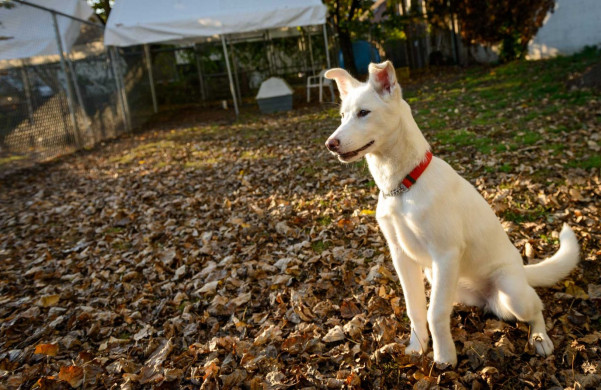
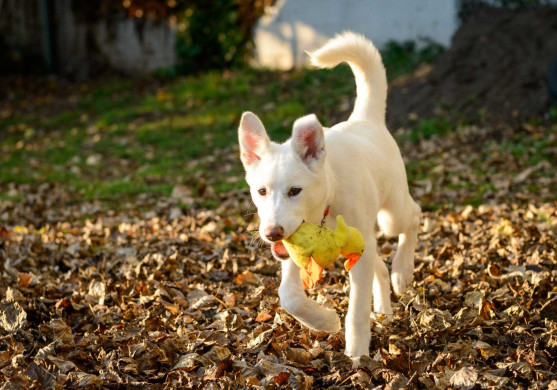
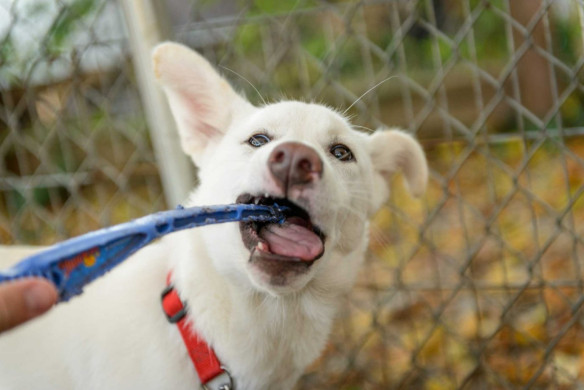
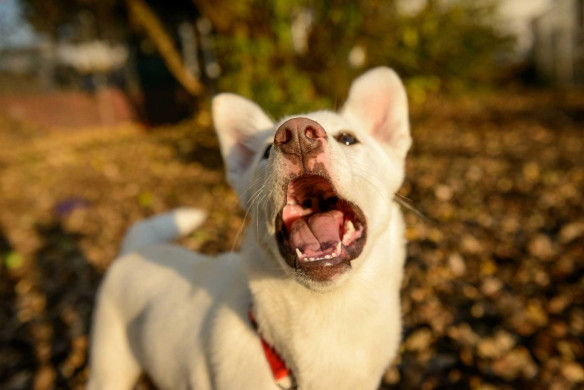
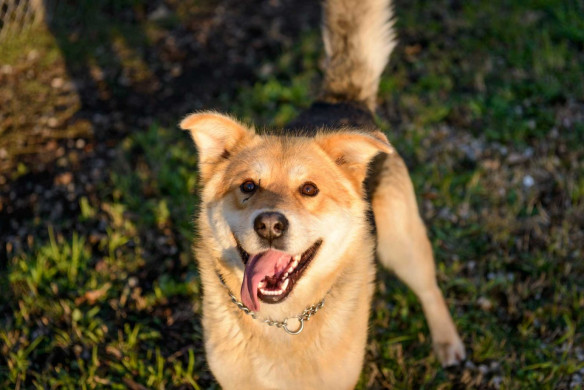
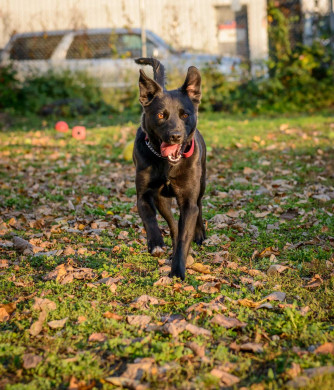
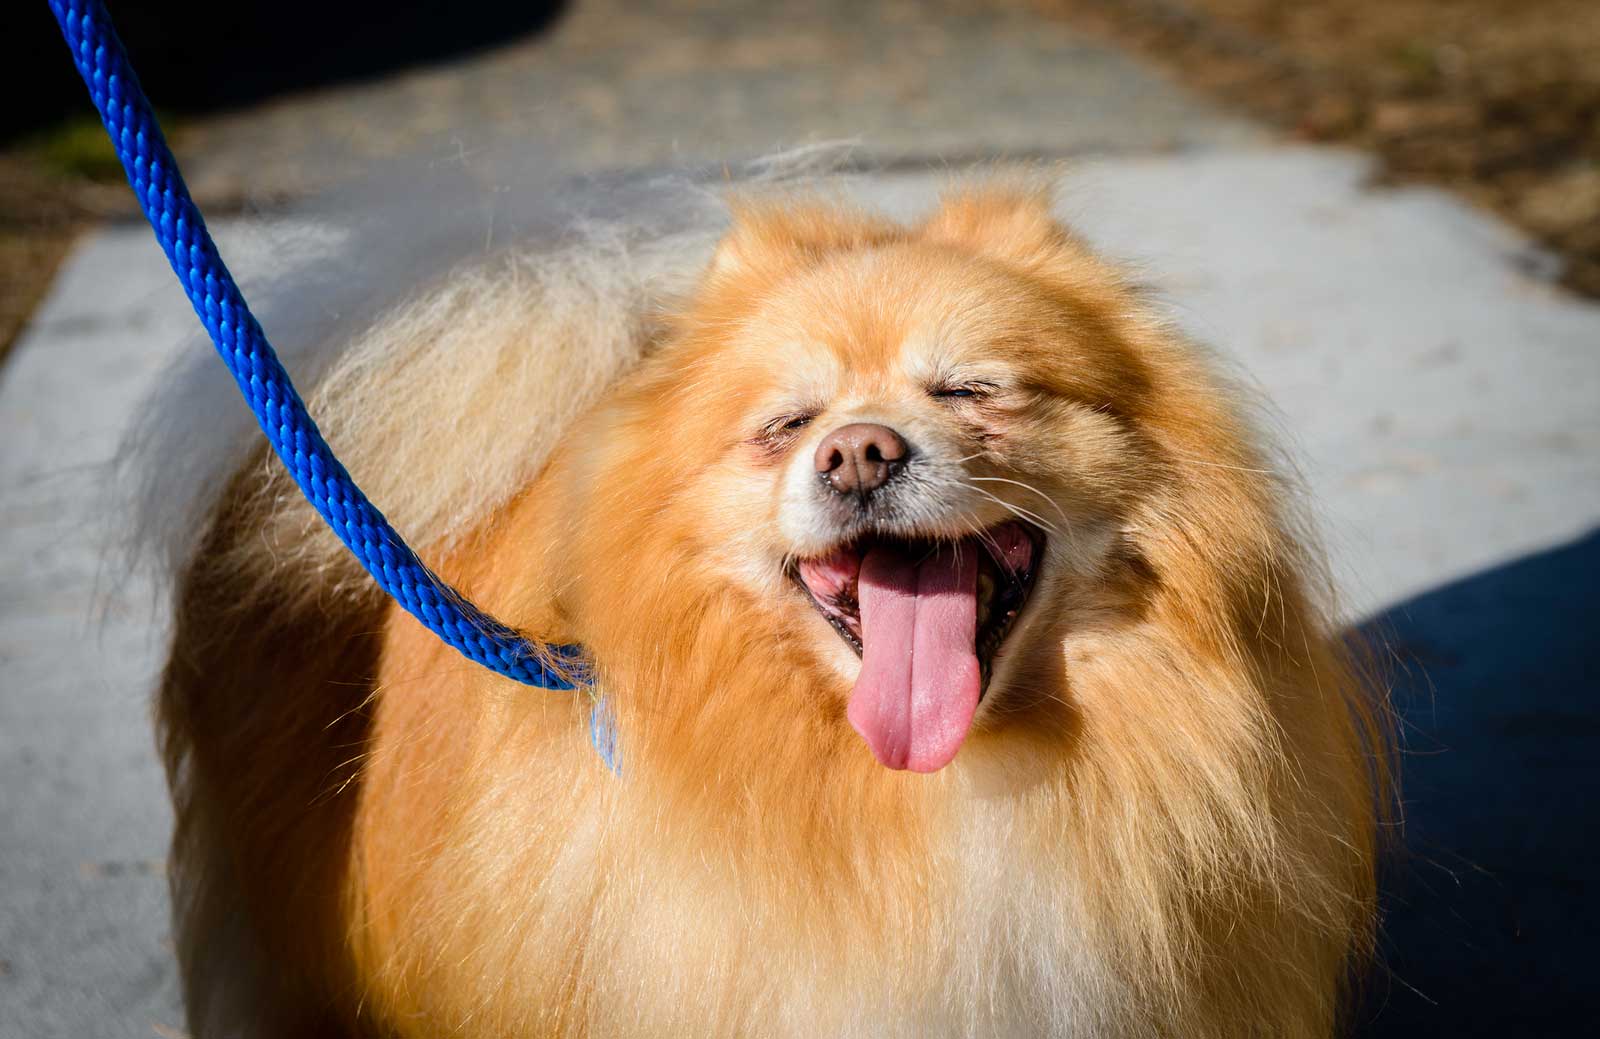
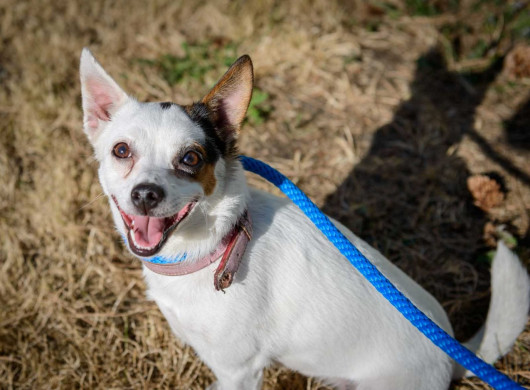
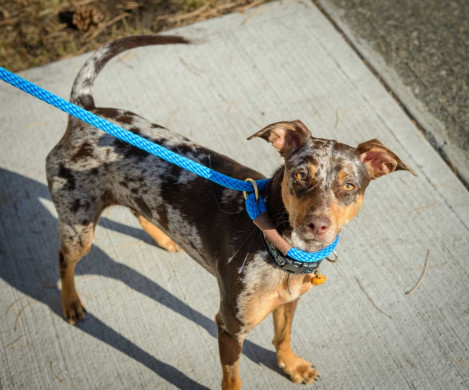
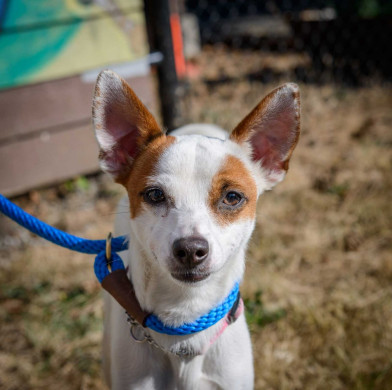
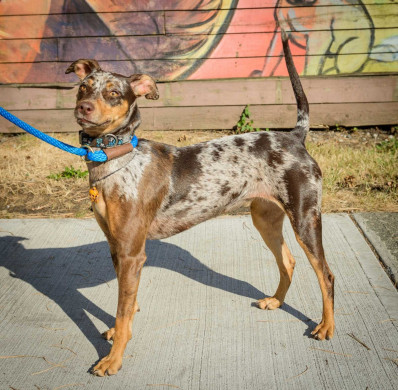
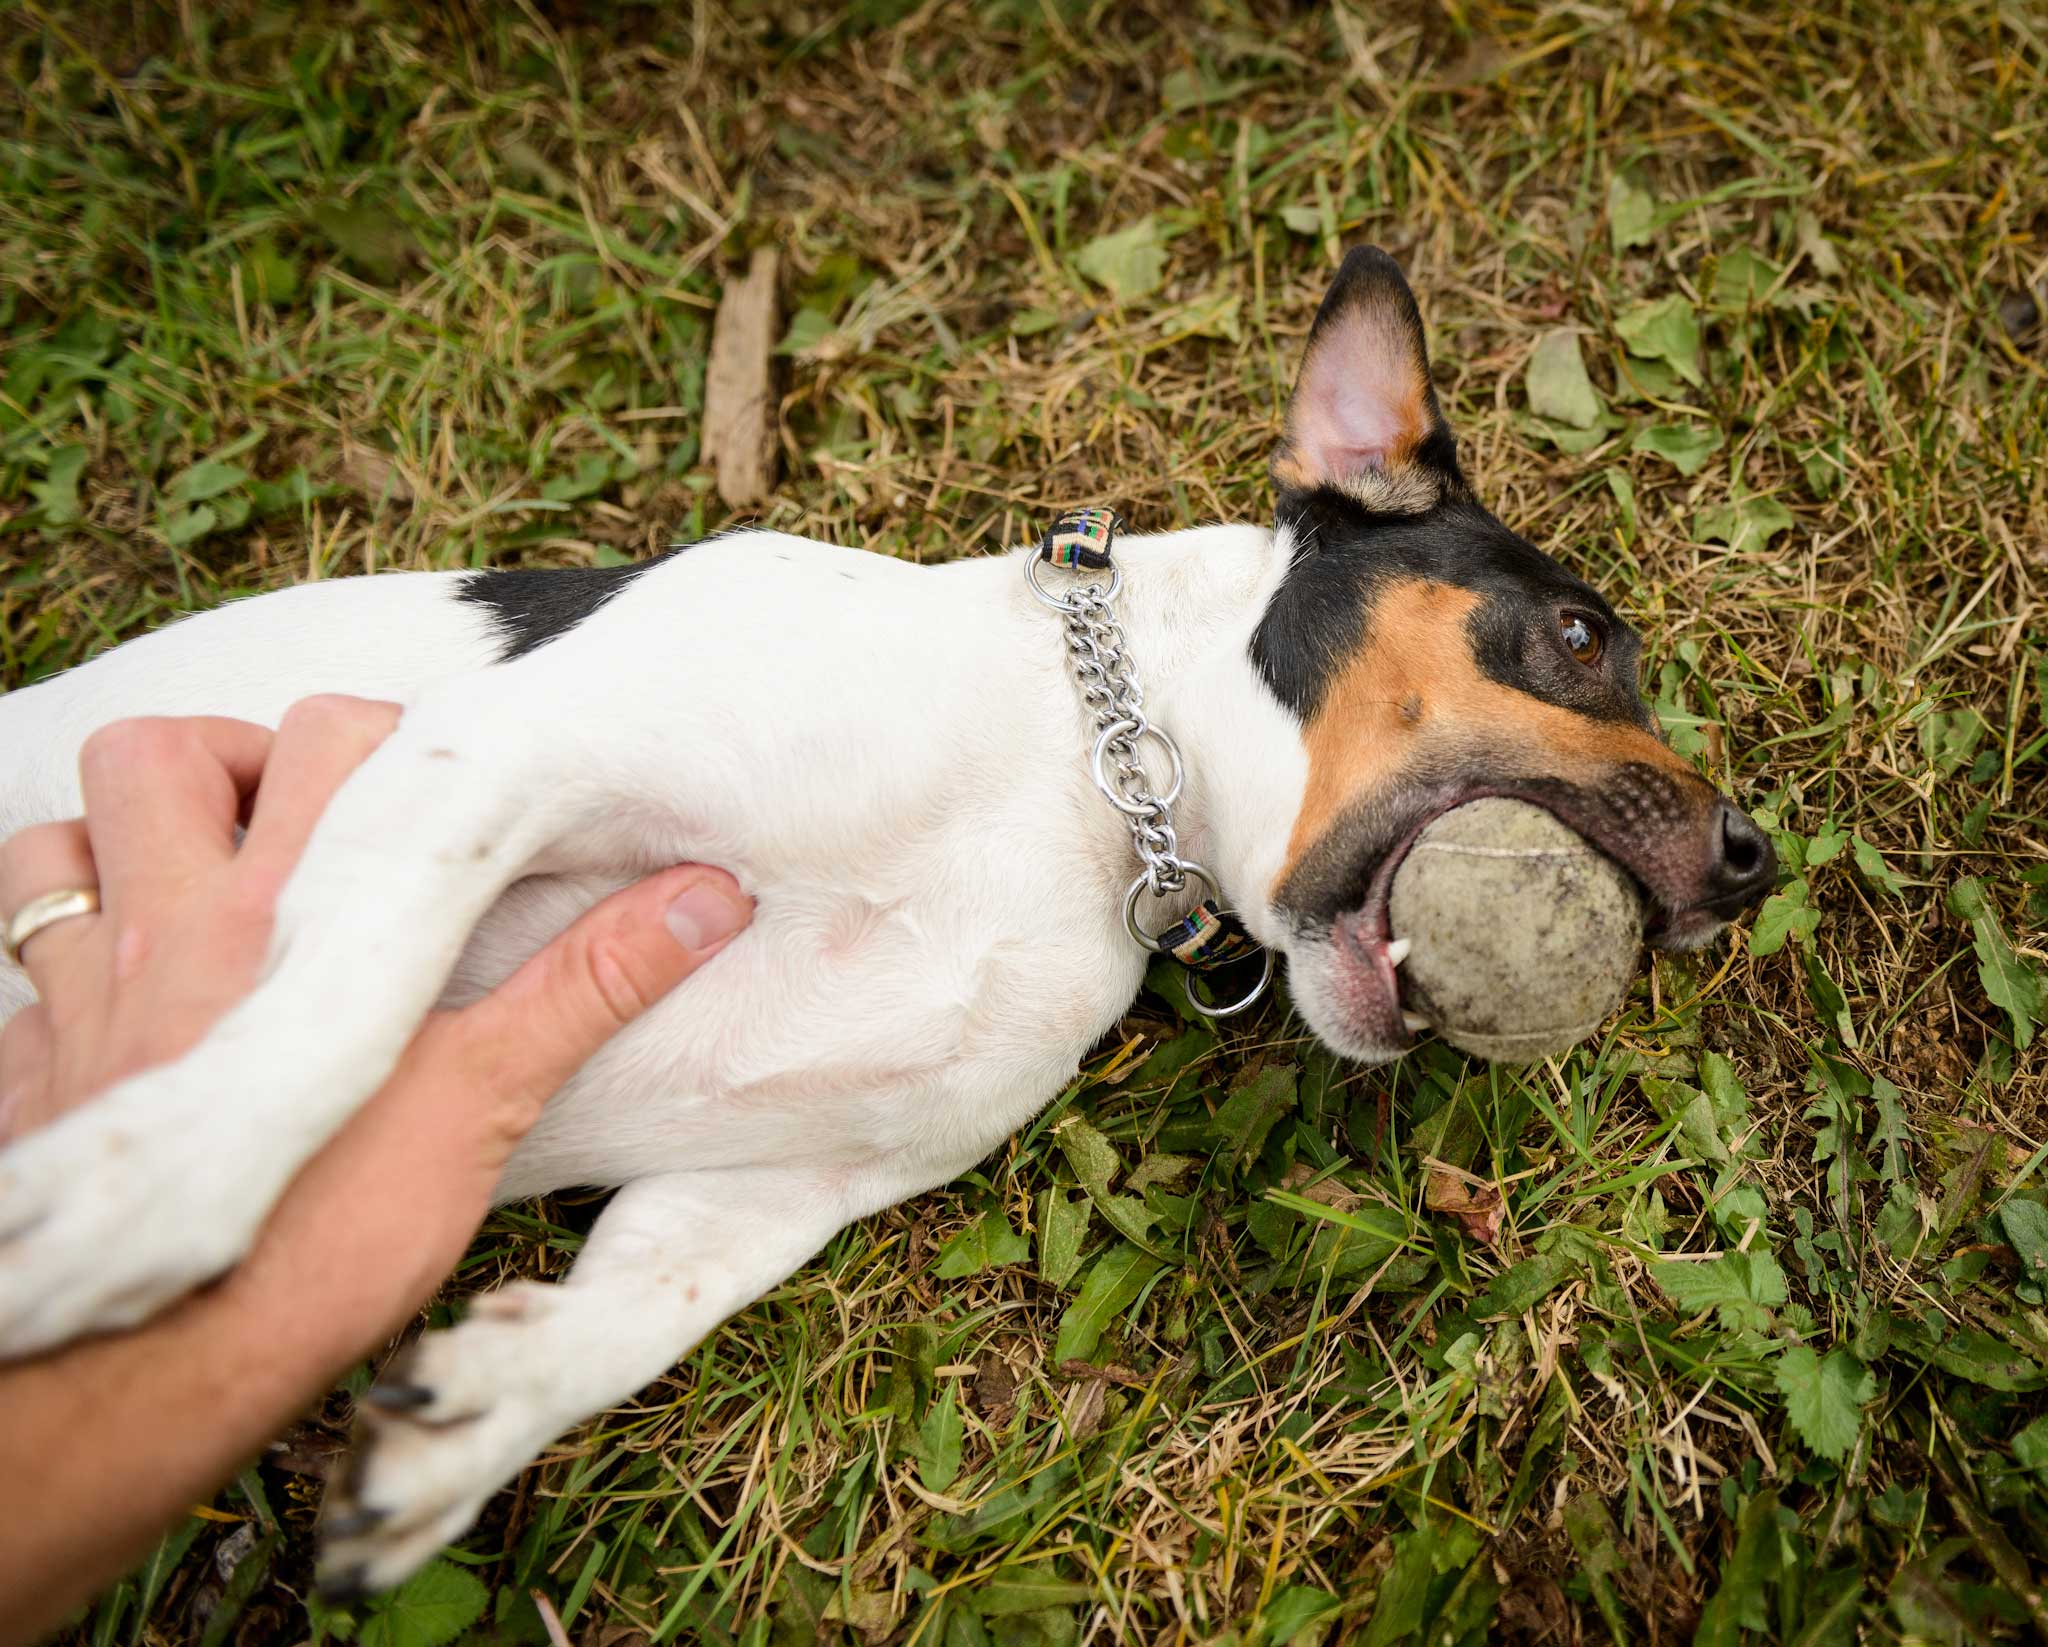
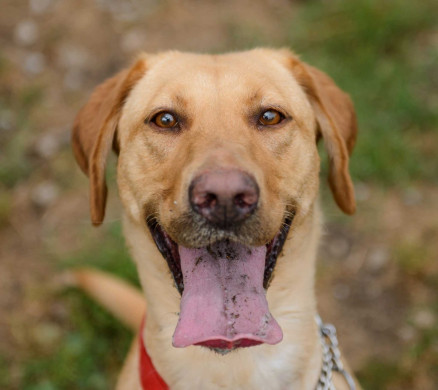
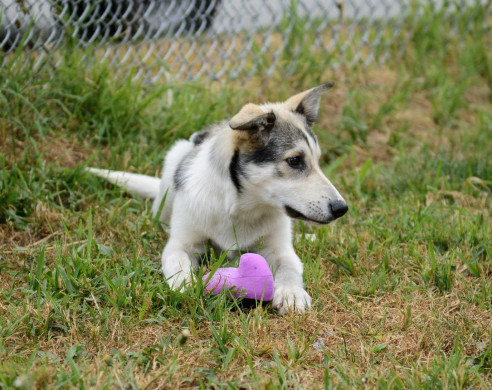
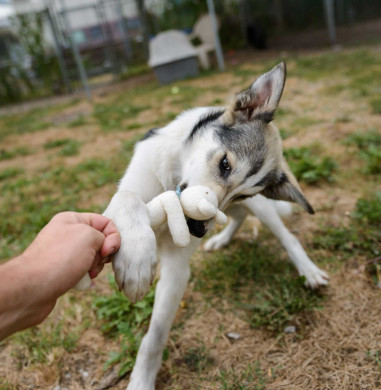
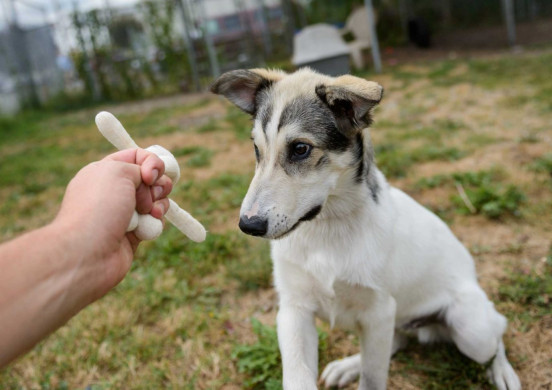
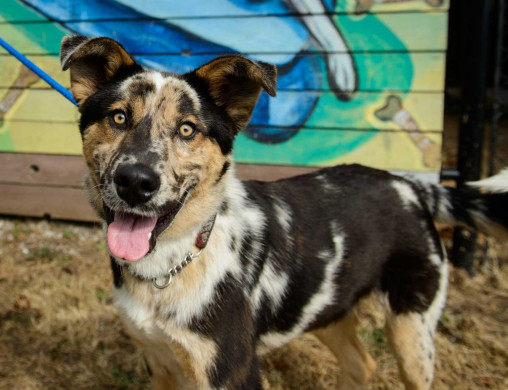
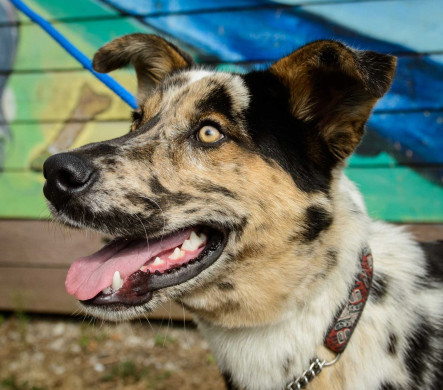
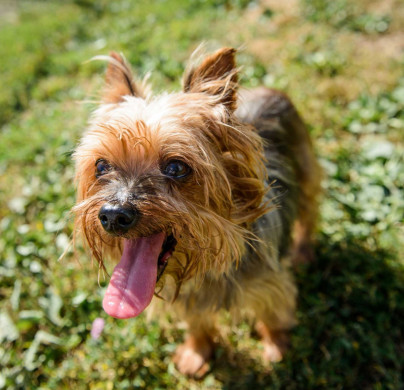
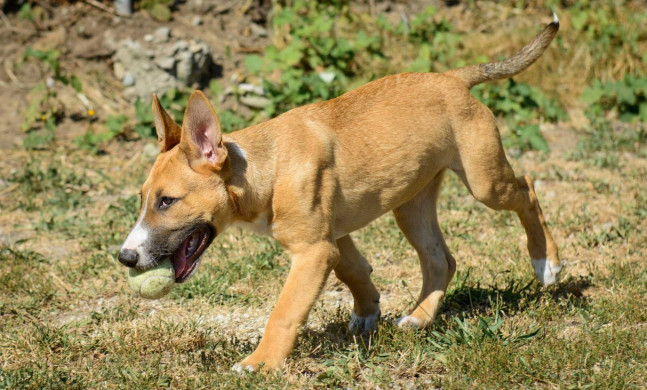
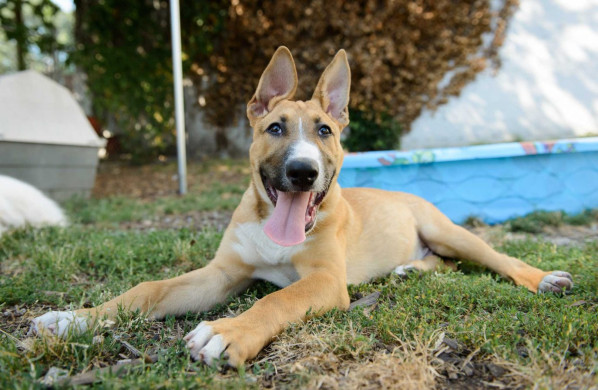
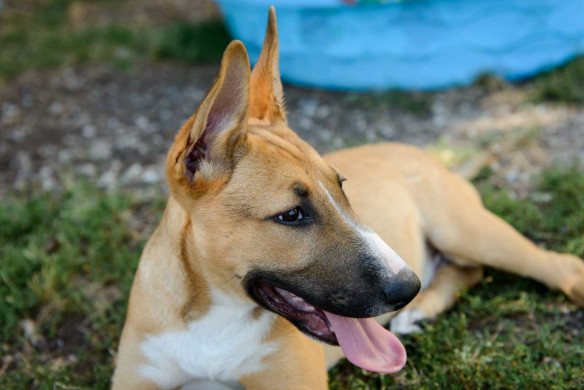
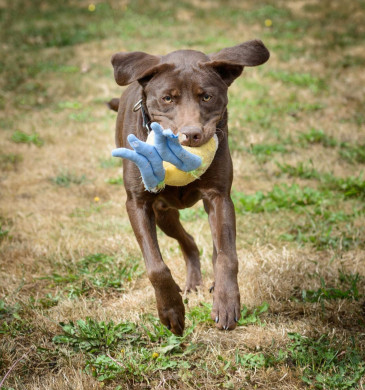
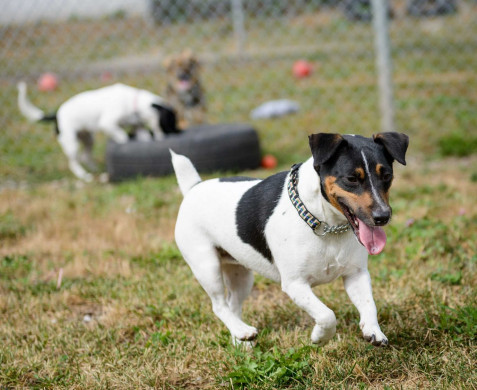
When needed, I try to help out at the local animal shelter (Vancouver Animal Control) by taking photos of their dogs available for adoption. I believe the quality of the photos makes a difference in the dogs adoption so I’m happy to help out when I can. It helps me and helps the dogs. You can see the animals they have available at PetFinder.com (not just dogs but rabbits, lizards, and at times even more strange things). You can also see previous shelter dogs I photographed here.
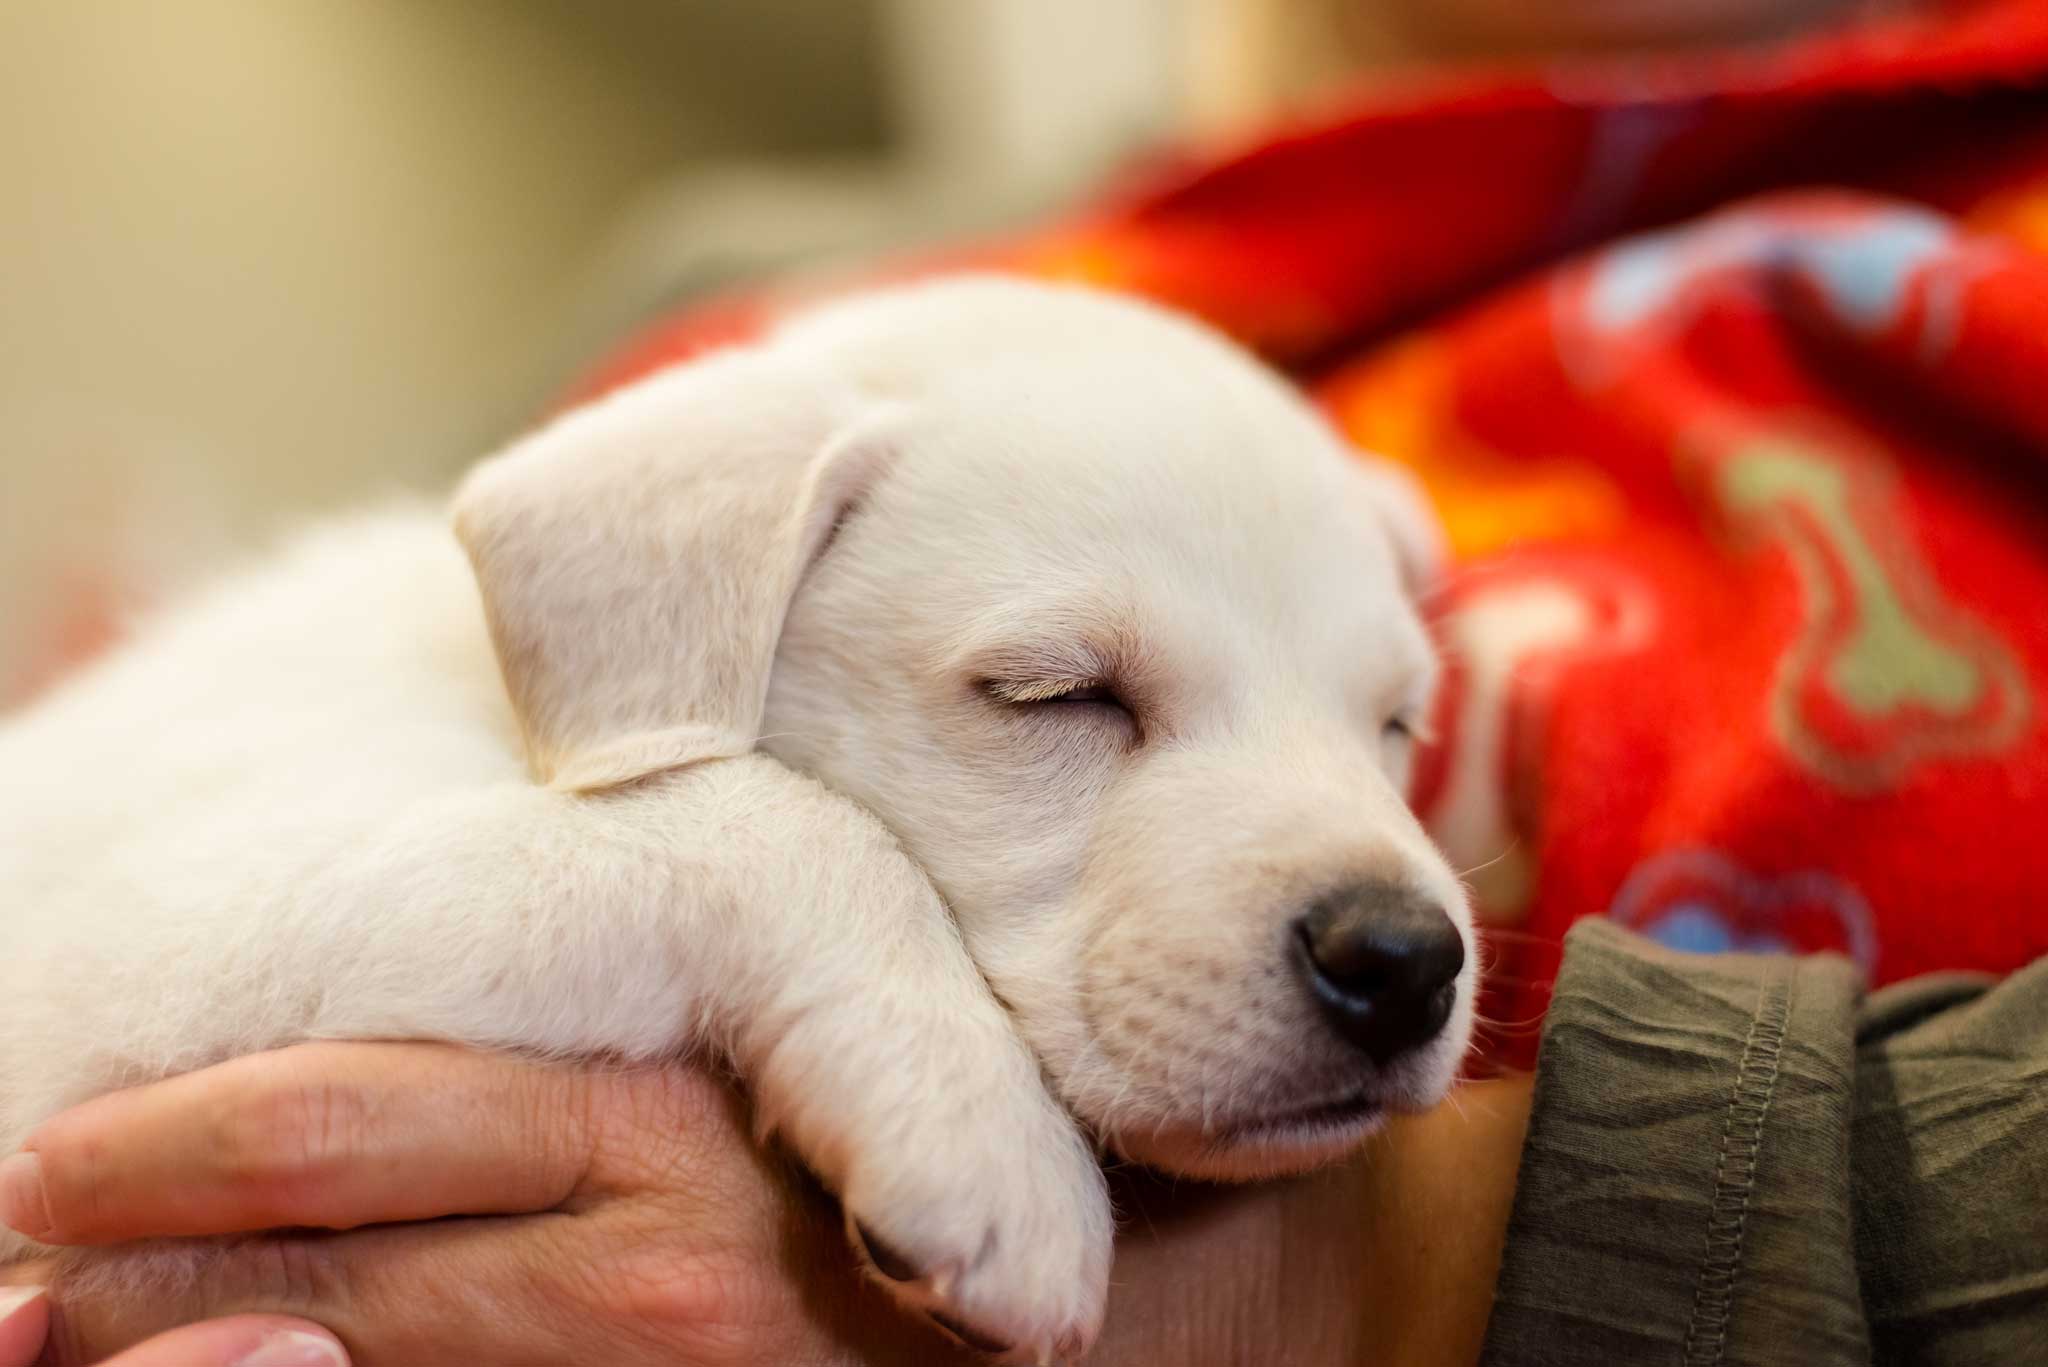
Yesterday, I went to the shelter to photograph a litter of puppies. They look like little polar bears, so damn cute.


Belize Vacation
On November 30th, my wife and I left rainy Vancouver to visit Belize for the first time. Belize is a tiny country in Central America with a population of about 320,000. It is 290km long and 110km wide, you can literally drive around the whole country in one day if you wanted to. English is the official language which makes getting around very easy.
Due to our last minute booking we had to take four flights (Vancouver -> San Francisco -> Houston -> Belize City -> Dangriga) and a boat ride to reach our final destination, Coco Plum Island Resort. The last flight is on a small plane which lands on a tiny runway in Dangriga, just part of the adventure I suppose.


Coco Plum is on a small 16 acre private island about 15 minutes by boat from Dangriga. There are only 10 or so cabanas on the island, so it is very quiet and far removed from large resorts elsewhere in Belize. As soon as you arrive on the island, the staff make sure you are well taken care of. Bags are taken to your room, and the bartender makes you a tropical welcome drink. In our case, mosquito bites :)

The bar is a central hub of activity for staff and guests. Special thanks to Leo for being such a nice guy and a great bartender. Erwin, Bella, Sam, Crispin, and Byron also deserve special mention for making our stay fantastic. The roof of the bar is covered in t-shirts from former guests, each with its own message.

After check-in, we went to our cabana and were surprised how big they were. More than enough space for two people. Everything is very clean, well maintained and comfortable.


The ocean literally steps from the door.


The resort is beautiful, tranquil, and a great place to relax. Here are some shots from around the resort. The island in the photo below is another resort, Thatch Caye.


The long dock is one of the great features. During the day a place to relax. At night the lights attract rays, sharks (small ones, don't worry), and squid. It's also a good place to snorkel, we saw a lot of interesting creatures and I even found a huge live conch.

A large hermit crab.

Another type of crab which seemed to be unhappy about my presence.

Even an urchin which did a good job of hanging onto my hand.

The water is typical Caribbean: blue green, warm, and clear. Katie and I spent a lot of time snorkeling around the area. We also ventured out on most of the snorkel trips from the island to the local barrier reef. Belize has some of the best snorkeling I have encountered anywhere in the world and I have been to a lot of great locations. The reefs are still in great shape and there is a huge variety of coral, fish, and invertebrates. Spotted Eagle Rays are common.


A lobster trying to hide in the coral. The lobster here don't have big claws.

This puffer fish was also trying to keep a low profile, but I spotted him.

There are also a lot of birds in the area, including pelicans.

We had a few nice sunsets while we were there, though not quite as good as we had in Thailand and Hawaii.


On some days, there are several inland tours you can participate in. We chose to visit the Belize Zoo, which is small but well laid out and quite natural. Animals have large pens with plenty of room for cover. Considering that this is a third world country, the animals were well kept. Unfortunately, when we were there it was raining and a lot of the animals were not visible. We didn't get to see a jaguar, which is one of the big draws. It also made getting good photos harder, but here are a few from our visit.


On the say to the zoo, we also stopped at a gift shop that had captive Coatimundi. Similar to a racoon, they are very cute and curious animals. Unfortunately, they have to live in this small cage.

Being far removed from a large city there isn't much light pollution and on a clear night there are a lot of stars visible. Though I have almost no experience with star photography I decided to give it a shot. Here you can see the mangroves lit up from a small amount of light on the island.

I also tried to 'light paint' some of the mangroves with a flashlight in a few of the shots.

One of the cabana at night.

While the snorkeling was great, I also enjoy scuba diving and went out with divemaster Steve for two dives (thanks to Byron for setting it up!). As expected, it was amazing. The reefs are teeming with life.

Here Steve swims with a green sea turtle. This guy didn't seem spooked and just swam around with us for a while before moving on.

Pterois Lionfish are not native to the Caribbean, and are quite damaging to local species. They don't have the same predators here that they do in their native waters, and their numbers are rising. They are strikingly beautiful fish (though poisonous so don't get too close), but they should be removed from these waters when possible.

The variety of coral is just fantastic.


Some great camouflage.

Finally, a few parting shots. The bar at night.

Mangrove trees at sunrise. Shot straight into the sun, then converted to a sepia tone. I just liked the composition.

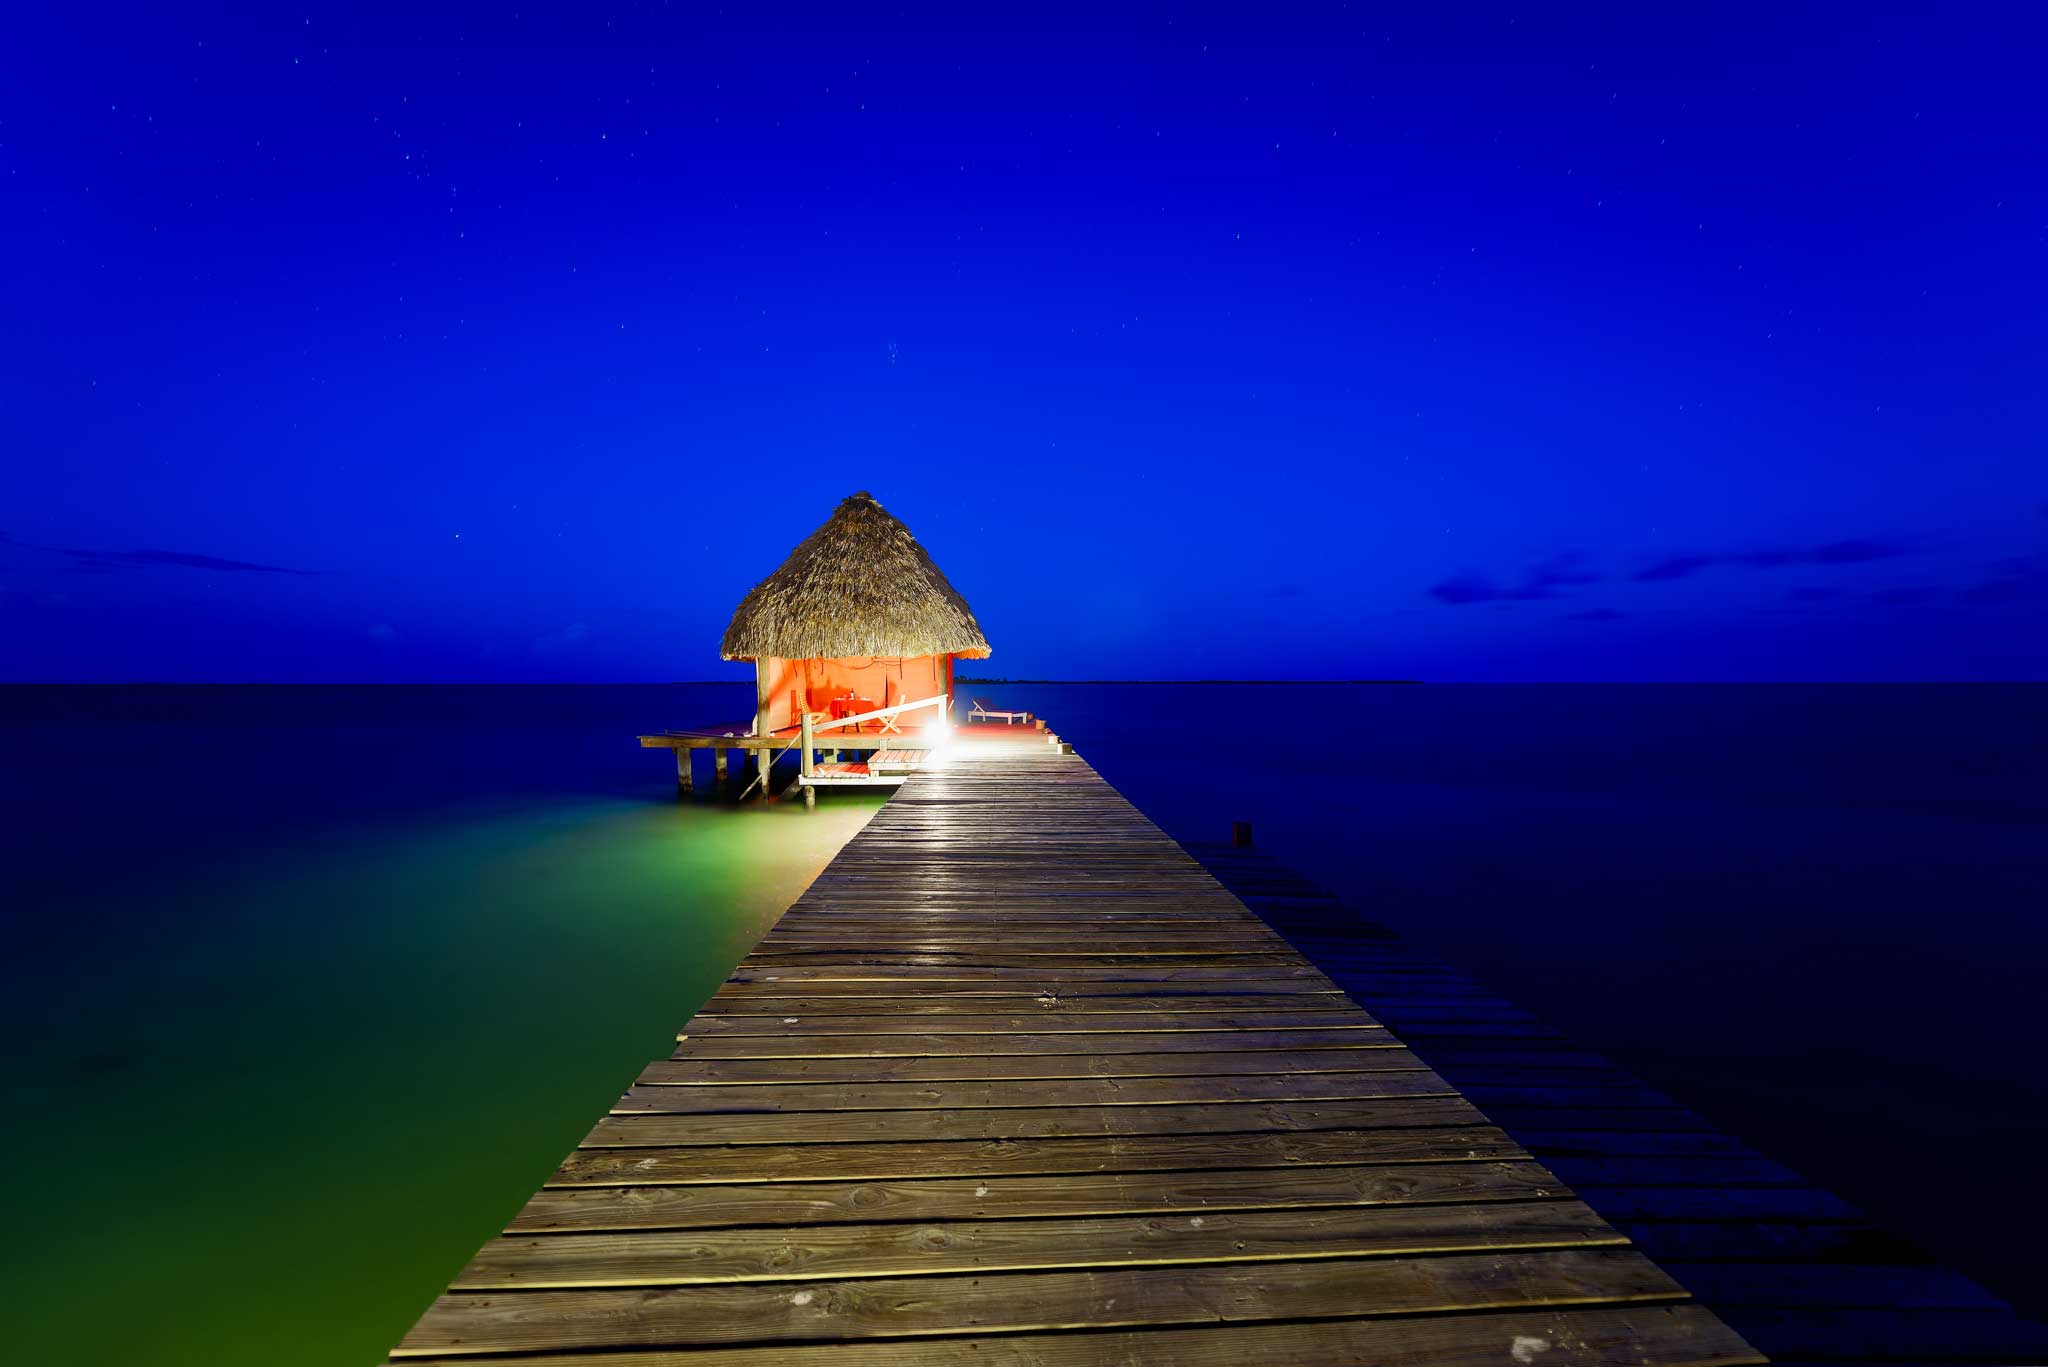
The dock at twilight, a few stars visible in the sky. In the evenings, the hut is converted to romantic dinner spot for two. I like the contrast of the warm red light in the hut with the cool blue and green tones of the surroundings.

We left a lot unseen in Belize, it will warrant a return trip some day.
A couple of people have asked what type of camera I used. I have a bit of info about some of my gear here, but specifically for these images I used:
- Nikon D800 DSLR camera
- Nikkor 14-24 f/2.8 lens (the wide angle zoom)
- Nikkor 24-70 f/2.8 lens (the normal zoom)
- Really Right Stuff TVC-33 tripod and BH-55 ball head
For the underwater photos, I use:
- Canon PowerShot SD870 IS Digital ELPH
- Canon WP-DC17 Underwater housing
The Canon camera and housing is a relatively inexpensive way to get decent underwater photos. The housing is good to 40m of depth and suitable for recreational diving. The major drawback is that I can't shoot in raw and adjust white balance in post processing. White balance adjustments are needed much more for underwater shots then for photos on the surface. Unfortunately, I can only do so much with a jpg file.

Nikon D800 Macro with Nikkor 105mm f/2.8 VR
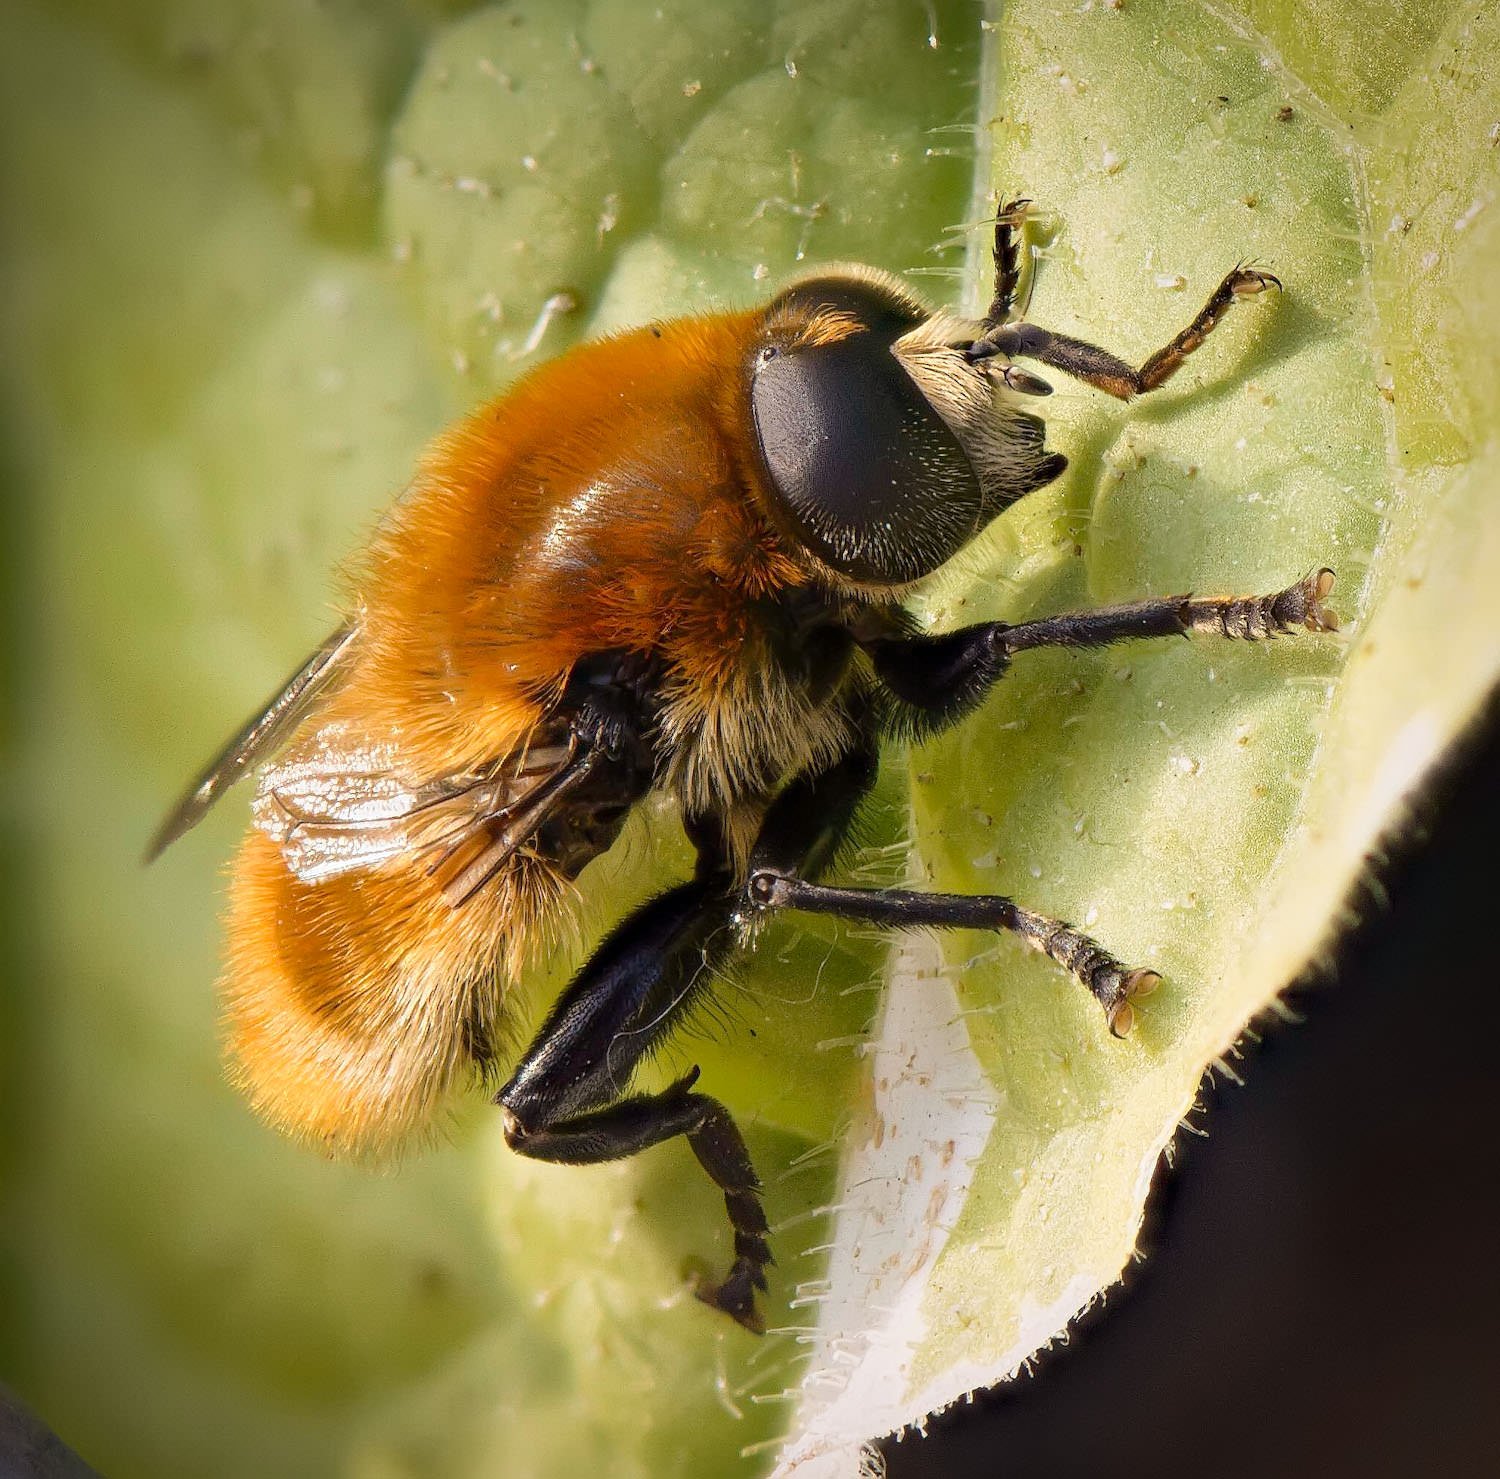
Today I got my Nikkor 105mm f/2.8 VR lens back from a friend who borrowed it. Since I haven't used it for a while I decided to bring it with me on my beach walk at Acadia Beach in Vancouver. It was a cold morning and I was hoping to get some interesting macro shots of frost but I didn't find any. I did take a few photos but I'll have to try another day to get some frost.
All shots hand-held, ISO800, processed in Lightroom.


Vancouver's CRAB Park at Portside
We had a small break in the rain tonight so I decided to head out to catch the last bit of daylight. I visited CRAB Park at Portside (Create A Real Available Beach), which is close to Canada Place and the Vanterm TSI Container Terminal. I didn't have much time but did get a few shots before heading home. It is certainly a place I will visit again soon.
One of my first shots when I arrived. Unfortunately in my haste I didn't check my settings and shot this image at ISO 3200. I had to apply a lot of noise reduction so it's softer than I would want. Still, the sky was very dramatic and I'm happy I got the shot.

The Vanterm TSI Container Terminal. An active port in Vancouver's Burrard Inlet with the North Shore mountains in the background.

Tug boats at the port.

I found a small pond which created some great reflections.

And finally a long exposure on my way out. Needs a return visit to try and get something better.


Shelter Dogs Nov 10 2012
When needed, I try to help out at the local animal shelter (Vancouver Animal Control) by taking photos of their dogs available for adoption. I believe the quality of the photos makes a difference in the dogs adoption so I’m happy to help out when I can. It helps me and helps the dogs. You can see the animals they have available at PetFinder.com (not just dogs but rabbits, lizards, and at times even more strange things). You can also see previous shelter dogs I photographed here.


Ucluelet Vacation
In early October my wife and I decided to visit Ucluelet, BC. It had been too many years since I made a visit to the 'real' west coast of BC. I forgot how beautiful and how close it is. From Vancouver it is only 200Km plus a 1.5 hour ferry ride. The weather was truly amazing, it was unseasonably warm for October and we made the most of it. At night it got quite cold but during the day it was in the mid 20's and sunny. I wore shorts, t shirt, and sandals, we couldn't ask for better weather.
On the way to Ucluelet, we stopped at a river to let the dogs have a break and enjoy some time out of the truck. Cedric immediately ran into the water and started to pull out sticks.

Jammie almost took our her eye by running through the forest.

Then she did her best impression of a wolverine.

We also stopped along one of my favorite spots along the drive. Here the river (I can't remember the name, if anyone can help please post in the comments) cuts into the bedrock leaving deep green pools and amazing formations. It is a busy spot in the summer, but now there was almost no one there.

Once we arrived in Ucluelet, we went to our condo which was fantastic. Located right on Big Beach and near the Black Rock Ucluelet Resort facing west for a fantastic sunset view.

Upstairs, Katie immediately took advantage of the chaise to relax.

I also managed to lure a resident blue jay in for a photo with some crackers.

Our condo from the front.

The first night we were there, we were treated to a beautiful sunset. I find that sunsets over the open ocean are often amazing and I have seen them from several spots in the world. With no obstructions and a completely flat horizon you have the most vibrant colors.

A few minutes later. The contrast between blue and orange is great.

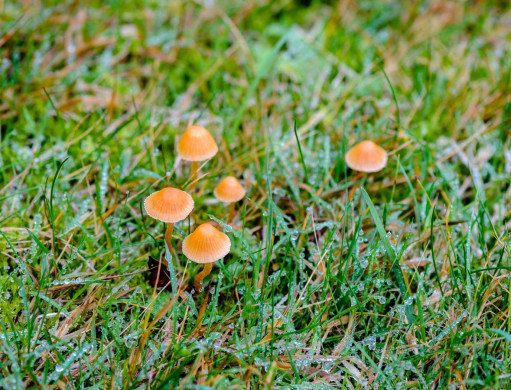
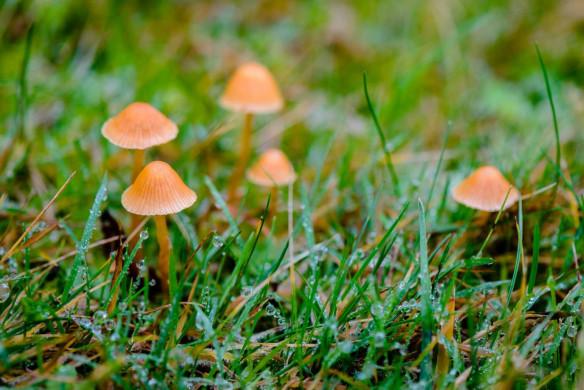
Katie and I spent a lot of time at Florencia Bay, it was a 20 minute walk to get there but we usually had the beach to ourselves. It is a nice walk through the forest and we saw a ton of different types of mushrooms so we dubbed Ucluelet the 'mushroom capital of BC'. Here are a few of them.


These are some of the best mushrooms to eat, I grew up collecting these with my family. Common name is the Saffron milk cap (genus: Lactarius).


No idea what this is, but looks like fungus so I'm throwing it in. If anyone can help identify it please post in the comments.


There were more, but I would just fill up this post mushroom photos. At the trail head to Florencia Bay, there was a funny sign. I guess you if you are going to deface a sign you have to do it right and in both languages.

Once on the beach, the dogs could run around and we could walk for ages and not see anyone else. There was bull kelp all over the place and the dogs loved to play with it.

I also found that it was hard to take a good photo of the waves.

The second night, I decided to venture out on the rocks at Big Beach for some sunset photos.


Also took a long exposure shot using a neutral density filter. I definitely need more practice with this, but it does give the water an interesting texture.

On my way back to the condo, I saw a couple of black tailed deer in the parking lot of the condo complex. They didn't seem to be too scared so I watched them for a few minutes.

One morning, I decided to try and photograph a sunrise instead of a sunset. I went to the lighthouse at the south end of the peninsula, it's near the Tofino MCTS Centre but it's actually in Ucluelet (go figure). This was taken just before the sun came up over the horizon. I was the only one there, very peaceful and quiet.
Shortly after the sun came up over the horizon.
 2")
Soon after the sun came up, another photographer joined me and said he could see a whale off shore. After a few minutes of looking, I did see a humpback whale breaching in the distance. I tried to get some photos, but it was just too far away to get a decent shot. Not long after this sighting, a gray whale came cruising by much closer to shore. Having seen two whales that day, I decided to check into a whale watching tour.

On the way to Tofino, we stopped at Long Beach. It was a foggy morning so we didn't stay long. I think other beaches in the area are much nicer but this is popular with the surf crowd.

Katie and I decided to go out with a tour company in Tofino. We did try to find a humpback but were unable to do so. However, we did get very close to two gray whales feeding. A great experience.

Two gray whale spouts.

A rainbow created by the spout of a gray whale.

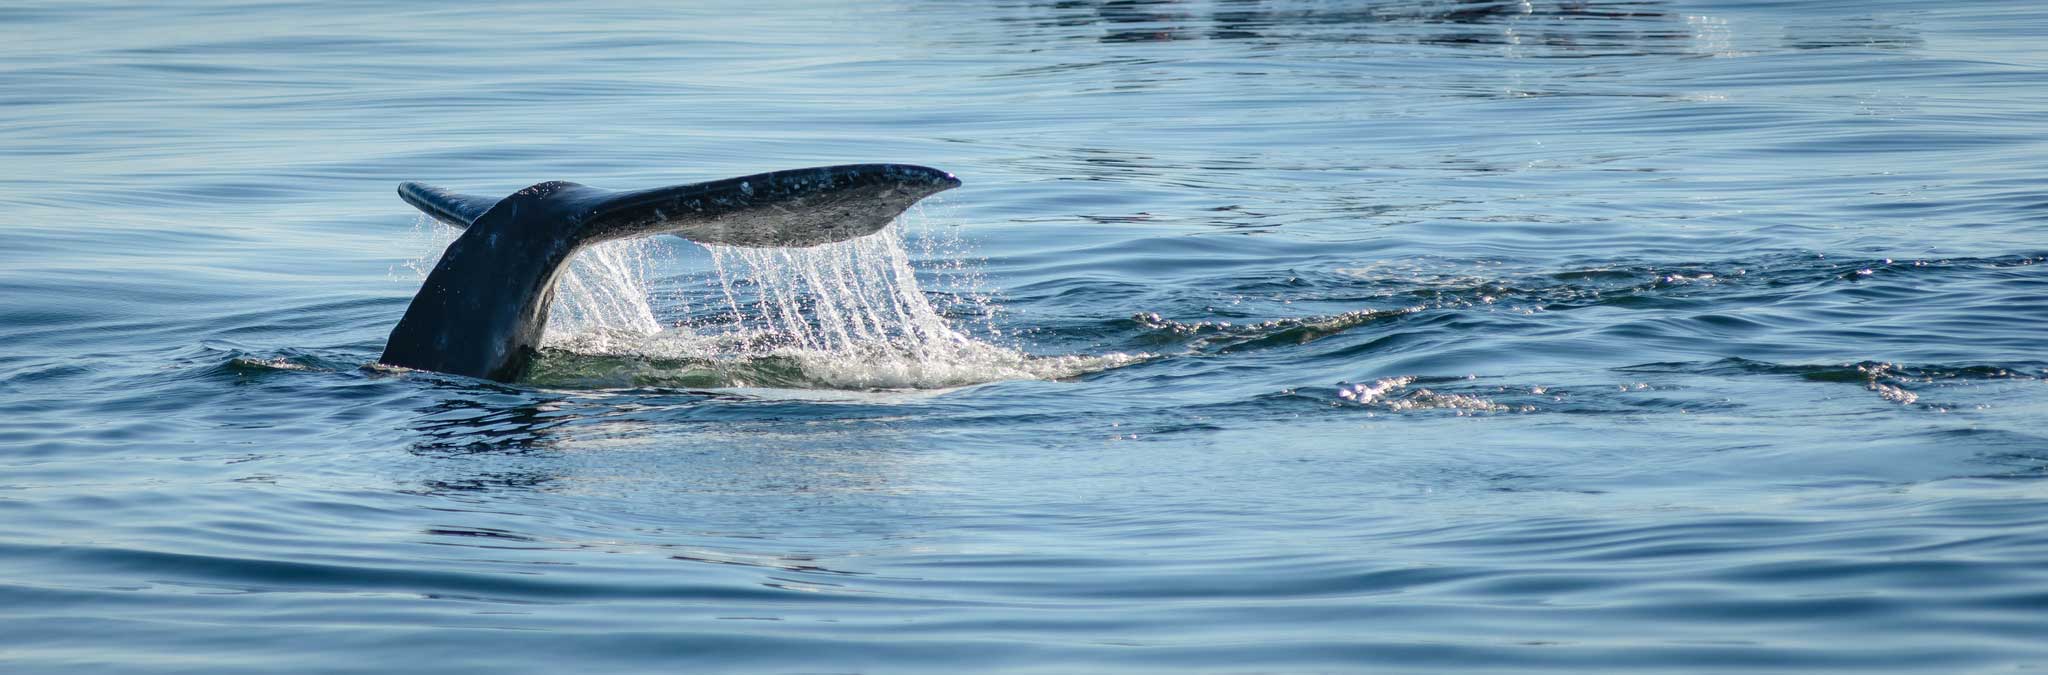
Considering how big these animals are, they are very graceful in the water. Even the giant tail fluke barely makes a splash as it sinks below the surface.
One more walk on the beach, here Katie is enjoying the sunshine and solitude with the dogs. It turned out to be one of my favorite photos from the trip.

We had a beautiful sunset every night we were there but the last one was the best. Clouds always make a sunset more interesting and colorful, this one was taken from our condo.


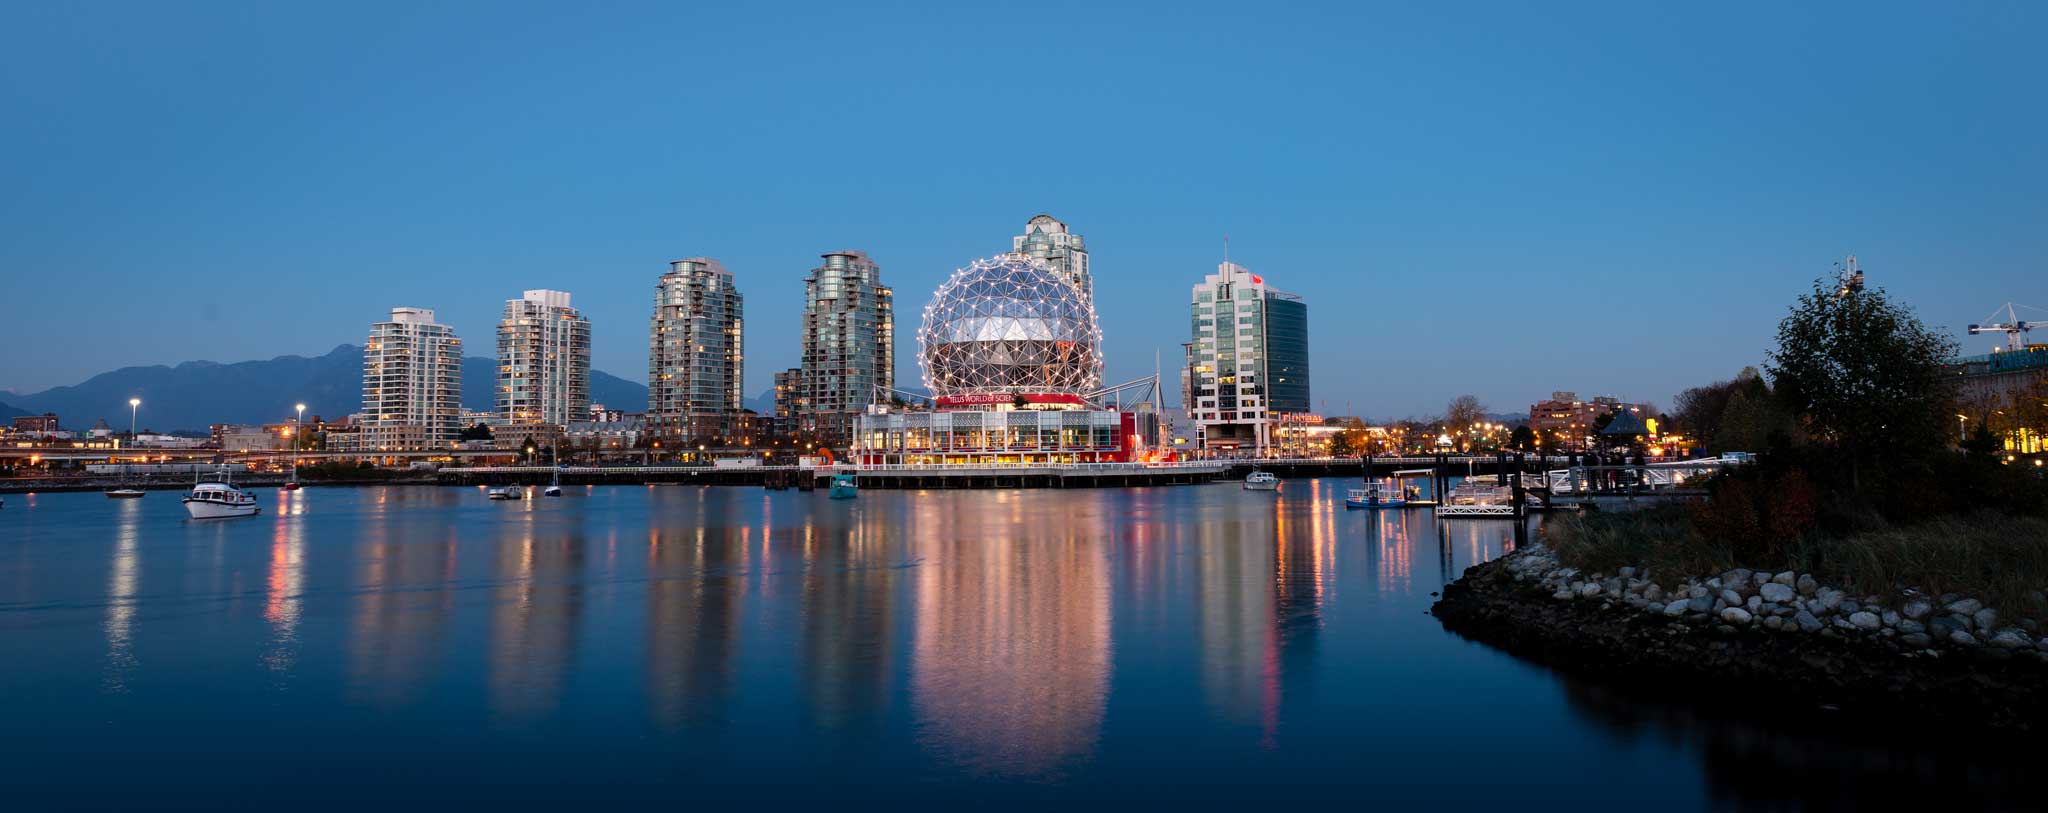
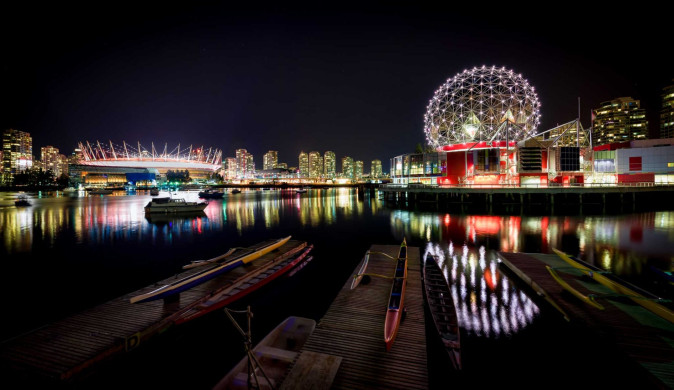
Vancouver False Creek At Night
Last night, I went out for a few sunset and night time shots with my friend Scott. Sunset was a bust, but we did get a few shots of Science World and the Vancouver skyline. Overall, a fun night out and made better as we finished up with a pint at the new tap house.


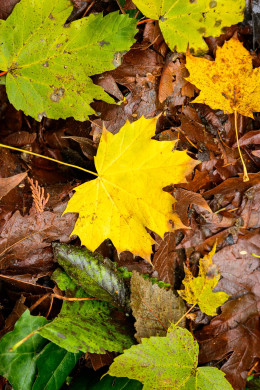
Fall Colours in Vancouver's Queen Elizabeth Park
Just as I did last year, I took a short walk through Queen Elizabeth Park to view and photograph the fall colours. The weather forecast said rain, and lots of it, for the next week so I knew it was my last chance before things got really wet. I hope to go back in a week or so, weather permitting. The conditions were not ideal, it was a bit foggy and I could not get a good shot of the whole garden without losing a lot of contrast in the background. I used a polarizing filter to cut some of the glare but some shots just didn't turn out that well. It was still nice to get out, the colours are really great right now.
This was one of the first images I shot. As you can see, the trees in the background are starting to get lost because of the foggy and humid conditions.

The sky was very bright which made some exposures more difficult but the fog and overcast conditions made for a nice diffuse light.


On my way out of the park, I stopped by the duck pond to watch the action and take a few shots. There were at least eight species of birds in and around the pond when I was there.
This guy was taking a bath in the pond just a few feet away from me.

King of the pond.

His little minion.


Nikon D800 vs iPhone 4S : Round 2
Coming back from hiking the Chief near Squamish, I decided to stop at Shannon Falls for one more quick photo opportunity. Shannon Falls is a beautiful waterfall outside of Squamish (between Vancouver and Whistler). It is the third highest waterfall in BC, and well worth a stop if you are in the area.
I had my Nikon D800 with me and was using the Nikkor 24-70 f/2.8 lens with a polarizing filter. I also decided to shoot the same scene with my iPhone 4S. Yes, not a fair test but just presented for fun. The iPhone fared much better this time compared to my previous attempt.
Here is the iPhone shot, edited on the device with Nik Software's (now Google's) awesome Snapseed.

Now the Nikon D800 shot, edited in Adobe Lightroom.
Both files downsampled to the same resolution. The iPhone did ok, though couldn't get the longer exposure time needed to get the softer water effect on the D800.

Nikon D600 Vs Canon 6D - Entry Level Full Frame Scrap
Photographers should be happy, both Nikon and Canon have released 'affordable' full frame cameras into their lineup. Nikon is already shipping theirs while Canon simply announced a camera with availability in a few months. Nothing like a 'me too' announcement when the competition gets the jump on you. Nikon is first to market with the D600, a $2100 USD, 24 megapixel camera. Canon follows up with the 6D, a $2100, 20 megapixel camera.
This year, there seems to be a shift towards Nikon in terms of technical camera performance. Before the latest models were released, Canon had a highly successful offering in the 5D Mark II, a 21 megapixel full frame camera with high quality video capability for $2700 (at launch). Nikon could not compete on video spec, or resolution with the D700 and D3S having only 12 megapixels. The insanely priced D3X had 24 megapixels but at $8000 it did not compete well with Canon's offering.
Fast forward to 2012 and Nikon has a 36 megapixel D800 ($3000), a 24 megapixel D600 ($2100), and a 16 megapixel D4 ($6000). Canon in turn released the 5D Mark III adding only 1 megapixel for a total of 22 and is now charging $3500 for the body. It follows that with a 20 megapixel 6D for $2100 and an 18 megapixel 1D X for $6800. Megapixels are not everything, but looking at the full frame landscape today it's obvious that Nikon didn't like taking a back seat and has come back with a vengence.
All those megapixels don't mean much if they don't perform well. Not only did Nikon ratchet up the resolution they also developed some high quality sensors as well. Looking at the DxO Mark scores you can see that Nikon is at the top of the pile in DSLR performance these days.

Looking at the scores, it's a thorough trashing of Canon. The Nikon cameras have a history of good dynamic range, but the new sensors really take it up a notch. Even the entry level D600 beats Canon's 5DIII. Unfortunately, the 6D scores are not available yet but I'm sure they will be lower than those of the 5DIII. Canon has some catching up to do in the next refresh of the lineup though I doubt Nikon will rest on their laurels.
With the sensor discussion out of the way (mostly), we can see how other features of the two entry level cameras stack up. Comparing the physical cameras first.
Left side view

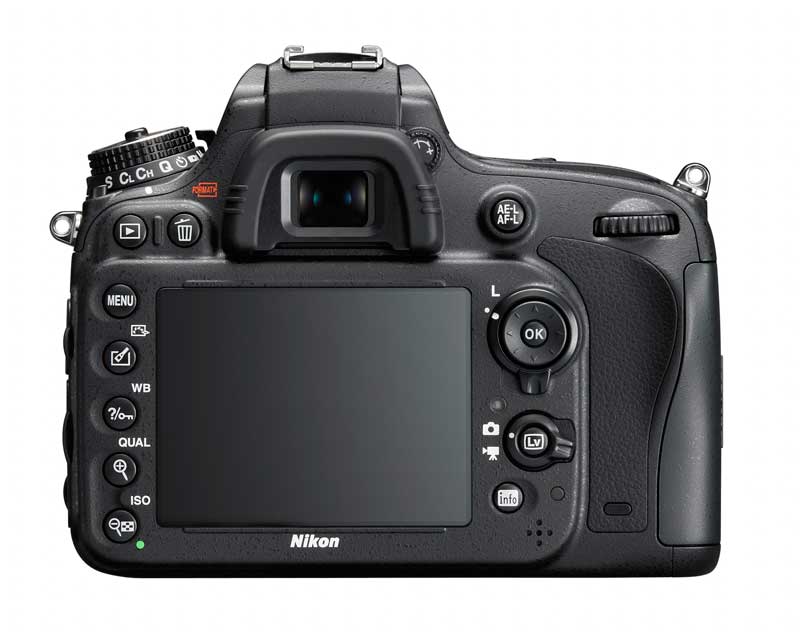
Rear view


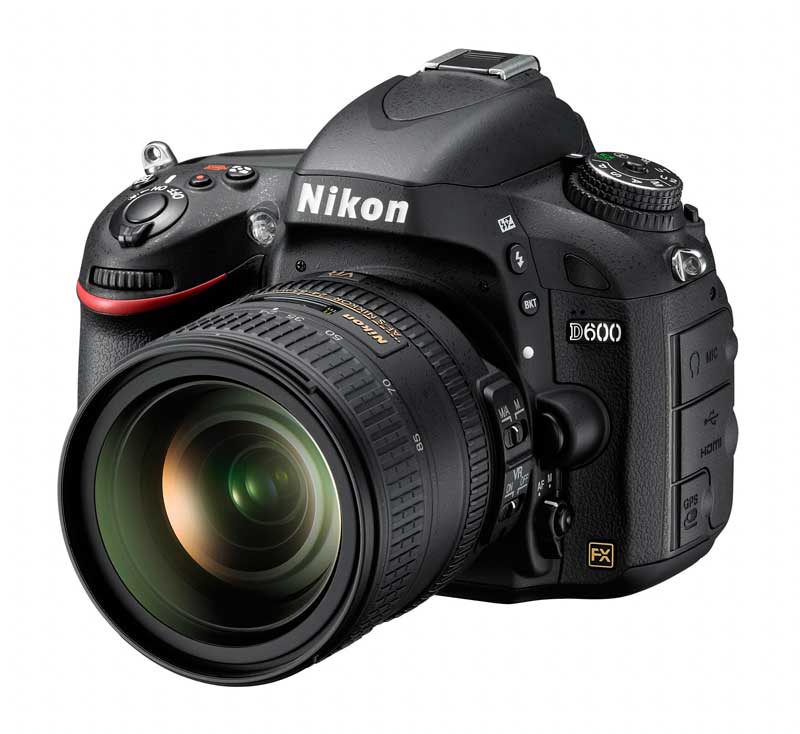
Front view


Top view


Nikon seems to put more buttons on their cameras, especially on the front. I can't comment much on the handling of the Canon cameras as I haven't spent much time with them so I'll reserve judgement on ergonomics and accessibility of features only to say that Nikon is clearly better ;)
Now looking at the basic specs.
Spec |
Nikon D600 |
Canon 6D |
| Sensor Resolution (MP) | 24.3 megapixels | 20.2 megapixels |
| Max Image Resolution | 6,016 x 4,016 | 5,472 x 3,648 |
| Viewfinder | Pentaprism | Pentaprism |
| Viewfinder Coverage | 100% | 97% |
| Built-in Flash | Yes (with wireless control) | No |
| Storage Media | Dual SD card | Single SD card |
| Frame rate | 5.5 fps | 4.5 fps |
| Max Shutter Speed | 1/4000 to 30 sec | 1/4000 to 30 sec |
| Shutter Durability | 150,000 | 100,000 |
| Native ISO | 100-6,400 | 100-25,600 |
| Boosted ISO | 50-25,600 | 50-102,400 |
| Autofocus | 39-point AF with 9 cross type | 11-point AF with 1 cross-type |
| Autofocus Detection | f/8 | f/5.6 |
| GPS | Via adapter | Built-in |
| Wifi | Via Eye-Fi | Built-in |
Nikon is clearly ahead in almost all of the performance specs. It has higher resolution, faster frame rates, better autofocus, and dual storage cards. Canon has better ISO numbers but I suspect the D600 will be clearly superior in low light performance compared to the 6D. Makes no difference if the 6D goes to 100K ISO, those photos are not usable. The DxO Mark scores already show that the D600 is better than the much more expensive 5D Mark III so it's unlikely the 6D will fare any better. Canon throws in some gizmos like GPS and Wifi to try and distract you from the obvious performance gap.
It's unlikely anyone would jump ship form one brand to another as an investment in lenses usually means the cost to switch is significantly higher than simply the cost of the body. I'm sure the 6D will be a capable camera however if you are new to the DSLR world and considering these two models the Nikon D600 is a technically better camera.
Also see: Nikon D7000 vs D600 vs D800.

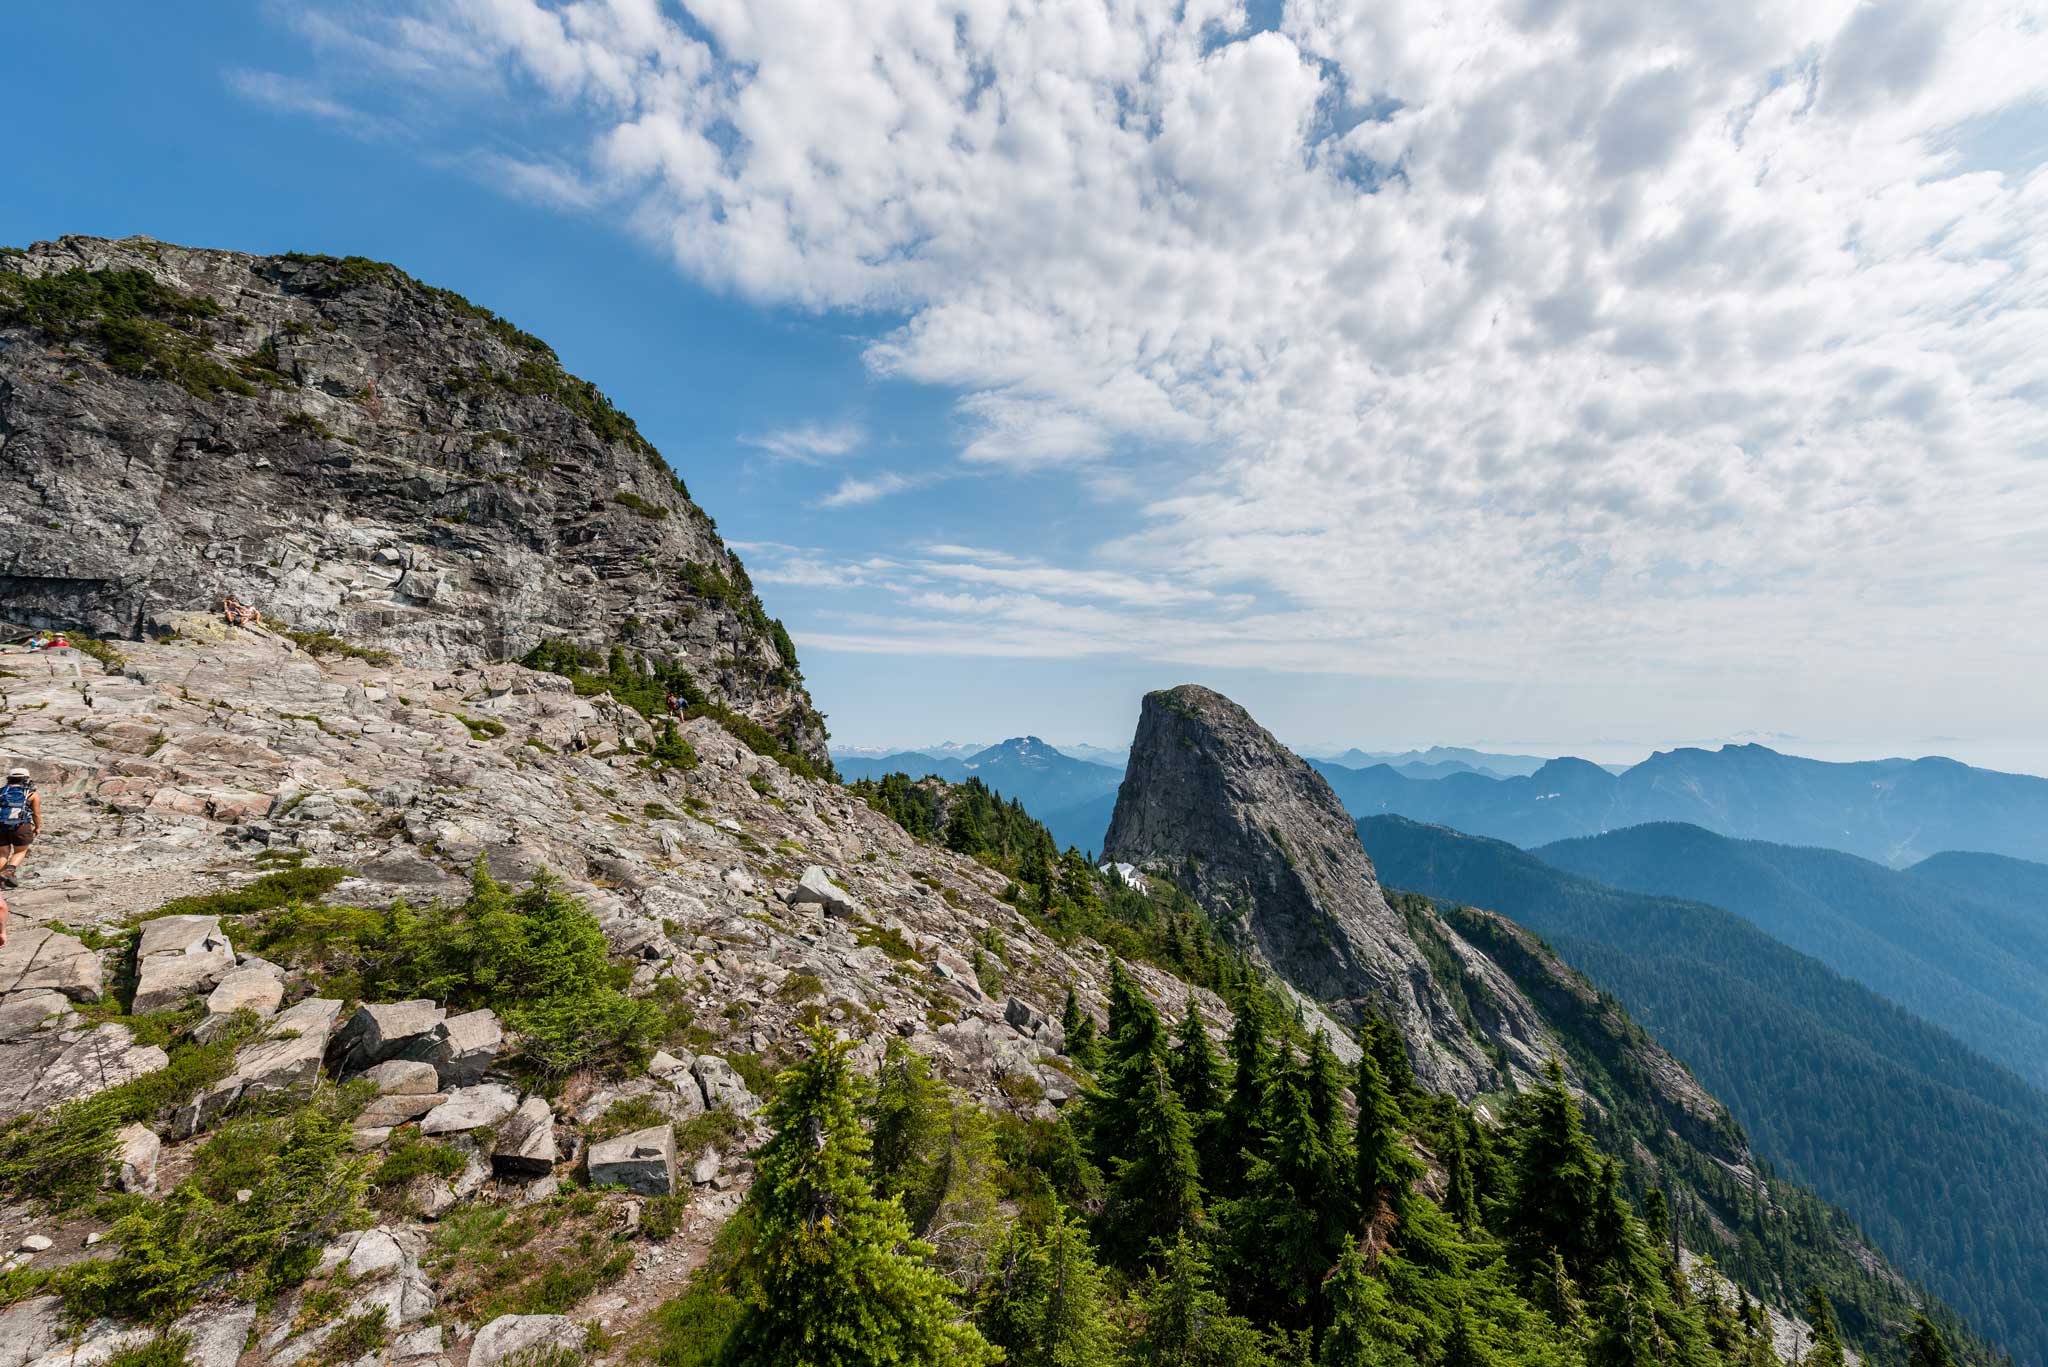
Hiking Stawamus Chief South Peak - Squamish, BC
Last week, I decided to head up to Squamish to hike the south peak of the Stawamus Chief. As with the Lions hike, I'm not going to go into how to get to the trail, etc. There are plenty of sites that can give you good info about the trail: Vancouver Trails, Club Tread, Trail Peak, Live Trails.
I wish I had got a better shot of the rock face, I'll have to do that next time.

This is a very popular hike in the area, expect to see at least a few people on the trail and on all of the peaks. The south peak is the most popular and the shortest hike as well. Middle and north peaks are less popular but still see their fair share of hikers. The Chief is not only popular with hikers, but is also a huge draw for climbers who come to challenge themselves on the granite face. I found this interesting video while writing this post: Patagonia climbing ambassador Sonnie Trotter climbed the first free ascent of Cobra Crack (5.14). Props, that is something that I'll never do.
You start your hike in the campground, nice and easy.

A map and some info before you start the hike.

Also a warning. The trail isn't long (about 6Km round trip) but it is steep and if you are unprepared you can get into trouble. I saw some yahoo going up in flip flops!

The trail is very well maintained. Kudos to the crew that come out to maintain this for the rest of us, very much appreciated.

Sure beats the stair climber at the gym.

Another sign along the route, very easy to follow as long as you pay attention. There are several of these along the way which will guide you to any of the peaks along with some of the other trails available in the area.

The trail is quite steep for most of the route.

Though well maintained, no cake walk and Mr. FlipFlop likely had a fun time in some sections.

The lower part of the hike is in the forest and the shade makes it easier on a hot day. As you get near the summit, you start to see the sun trickle though.

There are a few ladders on the route, don't see that on most hiking trails.


A large overhang looms over the trail.

Warning on the trail. As I said before, the area is popular with climbers so do not throw anything over the edge.

You know you are reaching the summit when the forest gets thin and the rocky soil yields to solid granite.


A chain and ladder help you navigate the grade.


Soon after, you start to get rewarded with some great views.

Don't get distracted though, one wrong step and you are going over the edge.

Now just a scramble to the top.

Tough life for trees that live on the summit.

Once at the summit, you get a beautiful view of Howe Sound and Squamish.

Just like on the Lions hike, this raven took the easy route to the top.

You can also see the middle peak with a few hikers enjoying the view.

Some hikers coming down from the middle peak.

I ventured to the cliff edge, though didn't spend much time there.

Along with my trusty Nikon I brought up my tripod and f-stop Guru backpack. It's a great pack for a day hike with photo gear.

Soon after I arrived, I was joined by a chipmunk.

We became good buddies after I gave him a couple pumpkin seeds from my trail mix.

Got any more???

A few more views from the top. Can anyone tell me the name of the mountain in the background? Please post in the comments. UPDATE: It is Mount Garibaldi (thanks Jesse).

Me wrecking a perfectly good shot.

A good spot for lunch.


Here is a map of my route to the summit tracked using Runkeeper on the iPhone.

While at the top, I also shot a complete panorama which resulted in a 100 megapixel image. If you want to see the full size image check my previous post.

On my way down, I stopped along the creek to take a few photos. I tried some shots with a polarizing filter and a neutral density filter to get longer exposures.


Finally, on my way home I topped in at Shannon Falls which is only a few minutes from the Chief. First, an HDR image of the falls, I was hoping it would turn out a little different.

And just a regular shot, but taken with a polarizing filter to get a longer exposure.


Nikon D7000 vs D600 vs D800 : A Quick Comparison
Nikon just announced their new entry level full frame DSLR camera, the D600. It wasn't a very well kept secret as leaks started getting out months ago. There was speculation that this would be a sub-$2000 USD camera but in the end the retail price at launch is $2100. Still a good price considering the sensor and other options. It looks like a blend between a D7000 and D800 both in terms of spec and appearance. Below you can see some of the similarities and differences between the three bodies.
The Nikon D600 with Nikkor 200mm f/2 lens.

I'm not gong to rehash the full specification of any camera. Nikon and many other reviews provide that info already. If you want to check into the details, here are the spec sheets for the three cameras: D7000, D600, D800.
What I do want to cover is how the cameras are similar and how they are different. Just taking a look at the camera, it looks like Nikon took a D7000 body and shoehorned a full frame sensor inside. Some modifications to the body were necessary, but for the most part the cameras are very similar in terms of layout.
Nikon D600 Front View

Nikon D600 Right Side View

Nikon D600 Left Side View
Nikon D600 Rear View
Nikon D600 Top View

Finally, a comparison between the D7000, D600, and D800
If you look at the three bodies, you can see that the D600 has some controls more like a D7000 and others more like a D800. Not a bad thing for a model that fits in between the two in the lineup. Users on either end of the spectrum should be comfortable with the controls, though I think it's more like a D7000 and targeted at the consumer/hobby segment of the market.
Nikon D700 users who were hoping for a clear upgrade path didn't get one. Nikon provided a clear upgrade for the D3S in the D4, but the D700 was essentially split into two cameras. The D800 a higher resolution but slower camera (which also replaced the D3X) and a D600 which is a smaller and less feature rich body. For professionals, the upgrade path is likely the D800 due to it's ergonomics, autofocus speed, full magnesium body, compact flash storage, flash sync, max shutter speed, and shutter durability. For hobby shooters, serious amateurs, and pros who need a back up body the D600 may be the better choice. It still provides great image quality in a smaller and lighter package. Regardless, the D600 at $2100 US is destined to sell very well.
In terms of pricing, Nikon has a very linear price curve at the lower end of the lineup. It's clear that they want to hit every market segment and ensure they capture every type of buyer. Having said that, the D300S seems to be the most in need of an update and without it in the lineup there would be a significant gap between the D7000 and the D600. To me, this means that a D400 will be announced in the not too distant future. It will likely carry on the tradition of a high end, high-speed crop sensor (DX) body with pro level ergonomics.

Differences between the cameras button layouts are obvious, no big surprises for anyone used to shooting a Nikon body. There are also some significant differences inside the shells as well.
Spec |
D7000 |
D600 |
D800 |
| Sensor Resolution (MP) | 16.2 megapixels | 24.3 megapixels | 36.3megapixels |
| Sensor Size | APS-C (DX) | Full frame (FX) | Full frame (FX) |
| Max Resolution (pixels) | 4928 x 3264 | 6016 x 4016 | 7360 x 4912 |
| DX Resolution (MP) | 16.2 megapixels | 10.3 megapixels | 15.3 megapixels |
| DX Resolution (pixels) | 4928 x 3264 | 3,936 x 2,624 | 4,800 x 3,200 |
| Sensor Pixel Size | 4.78µ | 5.9µ | 4.8µ |
The D800 is clearly the resolution leader, not just for Nikon but all DSLR cameras as of September 2012 (and likely for some time to come). The D800 also holds it's own quite well even when shot in DX mode. If you need the extra reach or still have DX lenses you get file sizes almost exactly the same as a D7000 but with the benefit of the better sensor and processing. However, no one should buy the D800 and shoot it in DX mode, use it just until you transition your lenses to FX or the odd time you don't need the full 36mp. If you plan to shoot DX all the time, save yourself $2000 and buy a D7000. The D600 has the biggest pixels, and likely the best pixel level noise traits but that is not relevant because what matters is noise level in the final image (on screen or in print). Downsampling a 36mp D800 file to the same resolution has noise benefits. I'm sure there will be a lot of comparisons between these two cameras very soon.
Spec |
D7000 |
D600 |
D800 |
| Frame Rate | 6 fps | 5.5 fps | 4 fps (FX), 6 fps (DX with grip) |
| U1 & U2 Modes? | YES | YES | NO :( |
| Sync Speed | 1/250 | 1/200 | 1/250 |
| Max Shutter | 1/8000 | 1/4000 | 1/8000 |
| Storage Media | Dual SD cards | Dual SD cards | 1 compact flash + 1 SD card |
| Price | $1000 USD | $2100 USD | $3000 USD |
All three of these cameras have weather sealing, pentaprism (not pentamirror), 100% viewfinder coverage which is a good thing. D600 doesn't have USB 3.0, but who cares (most people use a card reader). The biggest disappointment for many users when the D800 was announced was the 4 fps shooting rate in FX mode. That is quite slow by modern DSLR standards but somewhat understandable when you see how much data is being crunched in that time. The D600 and D7000 are a more reasonable 5.5 and 6 fps respectively. I doubt anyone will complain about those specifications, they are fast enough for any enthusiast. The d600 gets the U1/U2 modes just like the D7000, it boggles the mind why Nikon did not include this on the D800. The menu banks are a joke by comparison, I don't even use them. Similar story with storage, D7000 and D600 both have dual SD card slots but the D800 gets SD+compact flash. Why? I get that they want to tailor to pros who may be invested in CF cards but give me a break. If you can buy a $3000 body you can likely but a couple of extra cards. With the resolution of the D800 most people will need new (and much bigger) cards anyway. It should have been dual CF, now I need to buy and carry two types of media.
One thing that is clear is that Nikon intentionally crippled the D600 with the 1/200 sync speed and 1/4000 max shutter speed. These may not be problems for many shooters, but for anyone serious about strobes or fast primes lenses in bright light will run into problems. Pros will likely skip the D600, even as a backup, for these reasons. Good for Nikon, bad for us.
In the end, the D600 fits very well into Nikon's new FX camera lineup. Unlike the previous lineup which had the D700, D3S, and D3X the new lineup of the D600, D800, and D4 offers better pricing for most users and a better distinction between the cameras in the lineup. I'm looking forward to seeing image samples from the D600 once they start getting into users hands.
Also see: Nikon D600 vs Canon 6D: an entry level full frame comparison
Shelter Dogs Sept 13 2012
When needed, I try to help out at the local animal shelter (Vancouver Animal Control) by taking photos of their dogs available for adoption. I believe the quality of the photos makes a difference in the dogs adoption so I’m happy to help out when I can. It helps me and helps the dogs. You can see the animals they have available at PetFinder.com (not just dogs but rabbits, lizards, and at times even more strange things). You can also see previous shelter dogs I photographed here.


100 Megapixel Nikon D800 Panorama from the Stawamus Chief
Today, I hiked to the top of the south peak of the Stawamus Chief, a popular hike near Squamish, BC. I took a lot of photos including the panorama below. The full size panorama is 22,383x4378 pixels (ok, not 100 megapixels but 98, close enough). Shot with a Nikon D800 and 24-70 f/2.8 lens. The variation of color in the sky is due to the use of a polarizing filter. It helps with contrast but because so much of the sky is visible the angle to the sun changes substantially in the shot from left to right.
First, a small version of the file, 2048 x 401 (0.82 megapixels, 641Kb)
If you want to see a slightly bigger version, here is a link to a 5000 x 978 (4.89 megapixels, 3.6MB) version of the file. It will open in a new window.
Open the larger file.
Finally, if you really want to download the huge 100 megapixel file (over 80MB) you can do so below. It is a zip file, I didn't want the file to open in the browser. Just download and unzip.
100 megapixel D800 panorama.
The PSD file that created the compressed jpg above is over 1GB in size and that is after I cropped a significant portion of the image from the top and bottom. There will be a lot more photos from this hike posted soon.

CFL Football: BC Lions vs Montreal Alouettes Sept 8 2012
Yesterday I went to my first CFL football game of the season thanks to a friend who couldn't use one of his season tickets. I like to go to a few games each year and the BC Lions are sitting at the top of the league standings and playing well. This was also my first visit to the new and improved BC Place Stadium and since it was a nice day the roof was open.
One of the first shots I took once inside. Seats were great.

I had my Nikon D800 with me and two lenses: Nikkor 14-24 f/2.8 wide angle and Nikkor 80-200 f/2.8 telephoto. Despite a decent reach of 200mm I still had to crop the images of the play. Also, while bright I had to shoot at ISO 400 otherwise shutter speeds were just not fast enough to freeze the action. Here is Tim Brown (35) ready to do his thing.

Anthony Calvillo (13) set for the snap and for the toss.


Paul McCallum (4) field goal.

There are always some interesting characters around.

Certainly one of the best parts of the game is when the Felions squad takes to the field.
This image is just to show the great ability to crop images from the D800. A 100% crop from the full size image.


This guy has a tough job.


Thanks ladies.

Always some crazy games for the fans. If it were me I would have ran into the field in that thing, they can keep the t-shirt or whatever you win.

Back to football, Sean Whyte (6) punting away the ball as the Alouettes couldn't get it done.

Travis Lulay (14) chased by the pack and making the pass.


Travis Lulay (14) scramble.

Lining up on the 10.

Crushing hit, one of the best in the game.

The Lions get the TD.

Here are a few views of the stadium from the upper deck.


Back to the game, Tim Brown (35) takes another kick.

Travis Lulay (14) in action.

Another Paul McCallum (4) field goal, I think he missed this one.

Souvenir?

Attendance at the game was 29,734 and the 50/50 jackpot went up to $34,500. The lucky guy who won it was in my section, high fives all around.

As always, some guys decide to start the wave. I'm all for it, but you are supposed to do it when the opposition has the ball. Just an FYI.

After some perseverance they did get it going.

Tracking it, patience.

Pretty happy with themselves.

Looking over the images, I noticed a zombie in the crowd. Glad I'm not in that section.

Is Khalif Mitchell (96) doing the robot?

Lions on the one yard line, not looking good for Montreal.

TD, no surprise.

And the free throw is good too.

A few more shots of the Felions, can't go wrong.


Dude, you're doing it wrong.


Despite the wide angle lens, I still couldn't get the whole stadium. Here is a panorama stitched from several images shot with the 14-24 lens.
Since there are some BC place photos in the mix, some previous shots I took of the stadium.


Shelter Dogs August 30 2012
When needed, I try to help out at the local animal shelter (Vancouver Animal Control) by taking photos of their dogs available for adoption. I believe the quality of the photos makes a difference in the dogs adoption so I’m happy to help out when I can. It helps me and helps the dogs. You can see the animals they have available at PetFinder.com (not just dogs but rabbits, lizards, and at times even more strange things). You can also see previous shelter dogs I photographed here.
Some very cute dogs in the bunch. My favorite is Tug, the little bull terrier.
These images should automatically display in high resolution for anyone who has one of the fancy new Macs with a Retina display.


D800 Autofocus Repair Testing
[box type="info"]Update April 1, 2013: Testing after the second repair attempt by Nikon is now online here: https://photokaz.com/2013/04/nikon-d800-autofocus-repair-testing-the-sequel/[/box]
[box type="info"]Update January 20, 2013: Initial testing showed changes to the focus performance and I thought the slight softness in some shots could be fixed with fine tuning. After more testing, I could not get consistently sharp results from fine tuning. I had to set my fine tuning for the Nikkor 24-70 f/2.8 lens to +20 and that still didn't result in good performance. My AFS 50mm f/1.8 and AFD 80-200 f/2.8 lenses also had to have +20 of fine tuning. I dropped off my camera and the three lenses with Nikon last week, told them the problems and said I wanted everything repaired. I will once again post my results when I get the camera back.[/box]
[box type="info"]Update February 9, 2013: Got my camera back from Nikon, still waiting for my 24-70 lens. Some testing with the 50mm f/1.8G using FocusTune is not looking promising :([/box]
I made a previous post about the issues my Nikon D800 had with phase detect autofocus, my test charts clearly showed a problem with the left side AF sensors. I dropped off my camera at Nikon and it came back with the following info.
[box]
B2
Service Repair Rank B2
ADJ FOCUS SYSTEM
ADJ AUTO FOCUS OPERATION
FIRMWARE UPGRADE
CLN CCD
GENERAL CHECK & CLEAN
[/box]
So it looks like Nikon actually did make a fix, though I have heard some people had cameras returned with B1 service repair but I'm not sure how they differ. Today I decided to do some testing on the 'fixed' camera to see if it was any better. Same test procedure as before, same Siemens Star test chart. I only tested the 24-70mm f/2.8 lens as that more obviously showed the problems before. Below you can see the results for the lens at 24mm, ISO 100. Top row is Live View manual focus (reference), next is Live View autofocus (to test contrast detect AF), then two rows viewfinder (phase detect) autofocus tests. The VF AF 1 is racking focus to the closest setting before letting autofocus take over, VF AF 2 was a rack to infinity.

Disregard the differences in white balance, the right test chart was closer to a different set of lights. Focus should not be affected overall, and shows relatively consistent operation left, center, and right.
I repeated the test at 70mm but this time didn't test Live View autofocus. Here are the results.

As before focus looks to be consistent, if not perfect, between the three tested points.
Finally, putting together my previous test charts with the updated tests shot today. Top row is Live View manual for reference, next row is the viewfinder autofocus tests before the fix and third row are the tests after the fix. This should clearly show that the fix worked. One thing to note is that the autofocus, even after the fix, is not in perfect focus however I hope that autofocus fine tune can fix that.

Hiking the Binkert Trail To The Lions
The Lions are two very familiar peaks that can be seen from Vancouver. I have hiked most of the mountains in the immediate Vancouver area but the Lions always looked down on me with a smug look. Every time I looked to the North Shore I could see the twin peaks and I knew I had to get up there one day. On August 18th, five of us decided to make the trek and I was the only Lions virgin in the group.
The trail starts in Lions Bay and is a 16km round trip journey. The elevation gain is 1280m (4200') with some very steep sections you will feel in your legs. This is a strenuous hike and of the hikes I have completed may be second only to Black Tusk in terms of effort. I would not bring your dog on this trail, there are sections that would not be easy for your four-legged friend and there are some very steep cliffs. The hike took us about 3.5 hours in each direction, with a one hour break at the top to enjoy the view, eat lunch, and take photos. For more detail on the trail feel free to check out these links (some include updates on conditions): Vancouver Trails, Club Tread, Trail Peak, Live Trails.
Some photos from the hike. First, the motley crew ventures out at the start of the day. The trail is fairly flat and everyone is feeling good.

Things begin to get steeper, everyone is still having a good time and chatting.

One of the only waterfalls along the route. Not much rain in the area lately and the snow pack is almost gone so it's really just a trickle at this point. Harvey Creek is much bigger with pools large enough for a dip. There is a well built bridge over this creek so you will certainly know when you are there.

The trail takes a sharp turn up and chatting turns into cursing.

Coming out of the trees, you are finally rewarded with stunning views of Howe Sound.


The Lions are still looming, a long way to go.

The group taking a breather after a few hours of hard climbing.

Back on the trail, hiking turns into scrambling.

And now with snow :)

Near the top of the rock scramble, views are still great and a good motivator.

After a few more tricky sections, you finally reach the ridge and see a full view of the Lions before you.

It was a bit hazy, but the view from the top was truly spectacular. Hard to beat and makes the 3.5 hour climb completely worth it.


You need to be careful with your footing on the ridge, there are very steep cliffs on both sides. One misstep and you won't be around to tell anyone about it.


Up close and personal with the West Lion.

The West Lion towering over Scott and Jason.


It is possible to climb to the top of the West Lion, but only for those with some experience with this type of activity should even attempt it. It is a high consequence climb with no room for error. If you decide to do it, you need to descend down a small cliff (a rope is provided). People here are waiting to climb down.

Once on the West Lion, find the best route up. You can see how steep it is in the photos below.


The hike is popular in the late summer, especially on a nice day. We didn't see many people on the trail, but there were a few at the top.

Of course, some things didn't have to climb to the top. Cheater :)

I can imagine life at the top is not easy for any plants or animals that choose to live here.


Vancouver feels very far away when you are up here.

On the way down, your knees will take a serious beating. The trail through the forest and the gravel road seem to stretch on forever. At the end of the day though, it's an amazing climb and worth the effort for anyone who wants to make the journey.