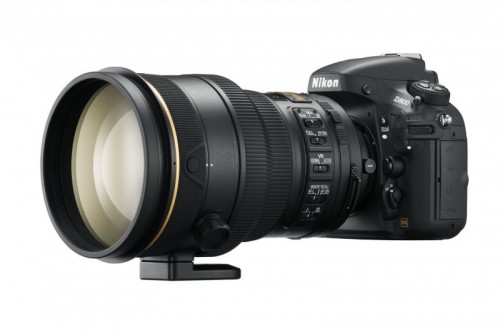
Nikon D800 and D800E Setup and Configuration
I now have a page with the setup and configuration for the Nikon D810.
A while back, Out There Images posted a list of recommended settings for the Nikon D800. I used that as a starting point to create four custom menu banks for my most common shooting situations. The menu banks are not great because they don’t save all of the settings you need to change, but they are better than nothing. The U1/U2 settings of the D7000 and D600 are superior to the menu banks both in terms of features and ease of use. I have no idea why Nikon has decided to leave out such a fantastic function on their high-end cameras. Neither the D800 nor the D4 have the U1/U2 settings. Nice work Nikon.
Here are the four menu banks I created:
- HDR – sets up the camera for high dynamic range shooting. I usually use a tripod, have time for manual focus, etc. If the shutter speed is fairly slow, I also turn on “Exposure delay mode” (custom setting d4).
- Action – I often use this when photographing dogs at the local animal shelter.
- Portrait – useful not just for portraits but for any stationary or slow moving target.
- Point & Shoot – Since I use the “AF-ON” focusing technique (*1), it makes it difficult to hand my camera to a stranger if I want to be in the photo. Rather than try to explain the technique, I just change the settings and let them shoot. I also use this mode when I give the camera to my wife, sometimes she just wants to take a few simple shots so this mode shoots in jpeg with things configured to make shooting easier.
The settings for all four modes are outlined below. Note that the settings just make the starting point for configuration easier. It doesn’t mean these are always the settings I use when shooting. I may not use ISO100 for all situations nor the same AF settings. If you want to use them as a starting point for your own custom settings it is easiest to just download my config file here: Nikon D800 custom settings file. You should also grab the custom picture control explained in footnote 3. To use the custom settings file, copy it to your media card, insert the media card into your camera and navigate to SETUP MENU -> Save/load settings -> Load settings. This will copy the settings over to your camera. You may want to save your own settings before you copy mine to your camera in case you need to revert back.
Note the [change this] in the settings below, these are things you will want to change in your own camera before you start shooting. At the bottom, you can also see what I put in “MY MENU” to access some controls I often change on the fly.
To switch between the various menu banks, you have several options:
- The slow way. Go to menu -> shooting menu -> shooting menu bank -> select your bank. Then go to custom setting menu -> custom settings bank -> select your bank.
- I have ‘shooting menu bank’ and ‘custom settings bank’ as the top two items of ‘my menu’. This allows me to change the settings relatively quickly but also provides a visual reminder of what banks I’m using when I go into this menu.
- The fastest way is to simply press the “info” button twice, that should select your shooting bank. Press the center button in the multi-selector, pick your setting. Do the same for custom settings bank.
If you have questions, or a suggestion feel free to leave them in the comments at the bottom of the page. If you want more detail on the settings below download Nikon’s D800/D800E manual (free), for something even better I recommend Thom Hogan’s Complete Guide to the D800/D800E ($30). Thom not only covers the options but gives you a recommendation on what to use for each setting.
| HDR | Action | Portrait | Point & Shoot | |
| EXTERNAL CONTROLS | ||||
| Exposure Mode | A (Aperture Priority) | A (Aperture Priority) | A (Aperture Priority) | P (Program) |
| Metering Mode | 3D Matrix Metering | 3D Matrix Metering | 3D Matrix Metering | 3D Matrix Metering |
| Bracketing | 5F, +/-1 EV (use 7 or 9F if needed) | Off | Off | Off |
| Shooting Mode | Timer | CH (continuous high) | CH (continuous high) | CH (continuous high) |
| WB | Auto | Auto | Auto | Auto |
| ISO | 100 | Auto | 100 | Auto |
| QUAL | RAW | RAW | RAW | JPEG FINE |
| Autofocus Mode *1 | Manual or AF-C, single point | AF-C, 3D | AF-C, single point | AF-S, Auto |
| SETUP MENU | ||||
| Format memory card | As needed | As needed | As needed | As needed |
| Monitor brightness | Manual (0) | Manual (0) | Manual (0) | Manual (0) |
| Clean image sensor | Clean at shutdown | Clean at shutdown | Clean at shutdown | Clean at shutdown |
| Lock mirror up cleaning | As needed | As needed | As needed | As needed |
| Image Dust Off ref photo | As needed | As needed | As needed | As needed |
| HDMI | Default | Default | Default | Default |
| Flicker reduction | Auto | Auto | Auto | Auto |
| Time zone and date | Set to local time | Set to local time | Set to local time | Set to local time |
| Language | English | English | English | English |
| Auto image rotation | On | On | On | On |
| Battery info | N/A | N/A | N/A | N/A |
| Wireless Transmitter | N/A | N/A | N/A | N/A |
| Image comment *2 | None | None | None | None |
| Copyright Information | On [change this] | On [change this] | On [change this] | On [change this] |
| Save/load settings | As needed | As needed | As needed | As needed |
| GPS | N/A | N/A | N/A | N/A |
| Virtual horizon | N/A | N/A | N/A | N/A |
| Non-CPU lens data | N/A | N/A | N/A | N/A |
| AF fine tune | Set for your lenses if needed | Set for your lenses if needed | Set for your lenses if needed | Set for your lenses if needed |
| Firmware version | N/A | N/A | N/A | N/A |
| SHOOTING MENU | ||||
| Shooting menu bank | A | B | C | D |
| Extended menu banks | ON | ON | ON | ON |
| Storage folder | Default | Default | Default | Default |
| File Naming | MKH [change this] | MKH [change this] | MKH [change this] | MKH [change this] |
| Primary slot selection | CF card slot | CF card slot | CF card slot | CF card slot |
| Secondary slot function | Backup | Backup | Backup | Backup |
| Image quality | RAW | RAW | RAW | JPEG FINE |
| Image Size | N/A | N/A | N/A | Large |
| Image area | ||||
| – Auto DX crop | On | On | On | On |
| – Choose Image area | FX | FX | FX | FX |
| JPEG Compression | Opitmal Quality | Opitmal Quality | Opitmal Quality | Opitmal Quality |
| NEF (RAW) recording | ||||
| – Type | Lossless compressed | Lossless compressed | Lossless compressed | Lossless compressed |
| – NEF bit depth | 14-bit | 14-bit | 14-bit | 14-bit |
| White Balance | Auto1 | Auto1 | Auto1 | Auto1 |
| Set Picture Control *3 | Custom (Live View Max Sharp) | SD (Standard) | PT (Portrait) | VI (Vivid) |
| Manage Picture Control | Default | Default | Default | Default |
| Color Space | AdobeRGB | AdobeRGB | AdobeRGB | sRGB |
| Active D-Lighting | Off | Off | Off | Off |
| HDR (high dyn. range) | N/A (disalbed when shooting RAW) | N/A (disalbed when shooting RAW) | N/A (disalbed when shooting RAW) | Off |
| Vignette control | Normal | Normal | Normal | High |
| Auto distortion control | On | On | On | On |
| Long Exp. NR | Off | Off | Off | Off |
| High ISO NR | Low | Low | Low | Normal |
| ISO Sensitivity Settings | ||||
| ISO sensitivity | 100 | 100 | 100 | 100 |
| Auto ISO sensitivity control | Off | On (Max ISO: 6400, Min shutter: auto,faster) | Off | On (Max ISO: 6400, Min shutter: auto,faster) |
| Multiple exposure | Off | Off | Off | Off |
| Interval timer shooting | Off | Off | Off | Off |
| Time-lapse photography | Off | Off | Off | Off |
| Movie settings | ||||
| Frame size/rate | 1920×1080; 30fps | 1920×1080; 30fps | 1920×1080; 30fps | 1920×1080; 30fps |
| Movie quality | High | High | High | High |
| Microphone | Auto sensitivity | Auto sensitivity | Auto sensitivity | Auto sensitivity |
| Destination | SD | SD | SD | SD |
| CUSTOM SETTING MENU | ||||
| Sustom settings bank | A | B | C | D |
| a1 AF-C priority select | Release | Release | Release | Release |
| a2 AF-S priority select | Focus | Focus | Focus | Focus |
| a3 Focus track lock-on | Off | Long | Short | Normal |
| a4 AF Activation | Off (AF-ON focus technique) | Off (AF-ON focus technique) | Off (AF-ON focus technique) | On |
| a5 AF point illumination | On | On | On | On |
| a6 Focus point wrap | Off | Off | Off | Off |
| a7 Number of focus points | 51 | 51 | 51 | 51 |
| a8 Built-in AF assist illum | Off | Off | Off | Off |
| b1 ISO sensitivity step val. | 1/3 | 1/3 | 1/3 | 1/3 |
| b2 EV steps for exposure | 1/3 | 1/3 | 1/3 | 1/3 |
| b3 Exp./flash comp step | 1/3 | 1/3 | 1/3 | 1/3 |
| b4 Easy exposure comp. | Off | Off | Off | Off |
| b5 Center-weighted area | 12mm | 12mm | 12mm | 12mm |
| b6 Fine tune optimal exp. | 0 (for all) | 0 (for all) | 0 (for all) | 0 (for all) |
| c1 Shutter-release AE-L | Off | Off | Off | Off |
| c2 Auto meter-off delay | 10s | 10s | 10s | 10s |
| c3 Self-timer | ||||
| – Self-timer delay | 2s | 10s | 10s | 10s |
| – Number of shots | 5 (should match # bracket exposures) | 1 | 1 | 1 |
| – Interval between shots | 0.5s | 0.5s | 0.5s | 0.5s |
| c4 Monitor off delay | ||||
| – Playback | 10s | 10s | 10s | 10s |
| – Menus | 1m | 1m | 1m | 1m |
| – Information display | 10s | 10s | 10s | 10s |
| – Image review | 10s | 10s | 10s | 10s |
| – Live view | 10m | 10m | 10m | 10m |
| d1 Beep | Off | Off | Off | Off |
| d2 CL mode shoot speed | 2fps | 2fps | 2fps | 2fps |
| d3 Max continuous release | 100 | 100 | 100 | 100 |
| d4 Exposure delay mode | Off (on if exposures slow) | Off (on if exposures slow) | Off (on if exposures slow) | Off (on if exposures slow) |
| d5 File number sequence | On | On | On | On |
| d6 Viewfinder grid display | On | On | On | On |
| d7 ISO display adjustment | Off | Off | Off | Off |
| d8 Screen tips | On | On | On | On |
| d9 Information display | Auto | Auto | Auto | Auto |
| d10 LCD illumination | On | On | On | On |
| d11 MB-D12 battery type | LR6 | LR6 | LR6 | LR6 |
| d12 Battery order | MB-D12 | MB-D12 | MB-D12 | MB-D12 |
| e1 Flash Sync Speed | 1/250 | 1/250 | 1/250 | 1/250 |
| e2 Flash shutter speed | 1/60 | 1/60 | 1/60 | 1/60 |
| e3 Flash cntrl built-in | TTL | TTL | TTL | TTL |
| e4 Modeling flash | On | On | On | On |
| e5 Auto bracketing set | AE | AE | AE | AE |
| e6 Auto bracket (Mode M) | Flash/speed | Flash/speed | Flash/speed | Flash/speed |
| e7 Bracketing order | Under > MTR > over | Under > MTR > over | Under > MTR > over | Under > MTR > over |
| f1 switch | LCD Backlight and info display | LCD Backlight and info display | LCD Backlight and info display | LCD Backlight and info display |
| f2 Multiselect center button | ||||
| – Shooting mode | Reset | Reset | Reset | Reset |
| – Playback mode | Zoom, medium magnification | Zoom, medium magnification | Zoom, medium magnification | Zoom, medium magnification |
| – Live view | Zoom, medium magnification | Zoom, medium magnification | Zoom, medium magnification | Zoom, medium magnification |
| f3 Multi selector | Off | Off | Off | Off |
| f4 Assign Fn button | ||||
| – Fn button press | Viewfinder virtual horizon | Viewfinder virtual horizon | Viewfinder virtual horizon | Viewfinder virtual horizon |
| – Fn button + command dials | Off | Off | Off | Off |
| f5 Assign preview button | ||||
| – Preview button press | Preview | Preview | Preview | Preview |
| – Preview button + command dials | Off | Off | Off | Off |
| f6 Assign AE-L/AF-L button | ||||
| – AE-L/AF-L button press | AE/AF lock | AE/AF lock | AE/AF lock | AE/AF lock |
| – AE-L/AF-L + command dials | Off | Off | Off | Off |
| f7 Shutter spd & ap lock | N/A | N/A | N/A | N/A |
| f8 Assign BKT Button | BKT | BKT | BKT | BKT |
| f9 Cust. command dials | Default (Off, on, off) | Default (Off, on, off) | Default (Off, on, off) | Default (Off, on, off) |
| f10 Release button to use dial | Off | Off | Off | Off |
| f11 Slot emply release lock | Lock | Lock | Lock | Lock |
| f12 Reverse indicators | – 0 + | – 0 + | – 0 + | – 0 + |
| f13 Assign MB-D12 AF-ON | AF-ON | AF-ON | AF-ON | AF-ON |
| g1 Assign Fn button | Power aperture (open) | Power aperture (open) | Power aperture (open) | Power aperture (open) |
| g2 Assign preview button | Power aperture (close) | Power aperture (close) | Power aperture (close) | Power aperture (close) |
| g3 Assign AE-L/AF-L | AE Lock | AE Lock | AE Lock | AE Lock |
| g4 Assign shutter button | Take photos | Take photos | Take photos | Take photos |
| PLAYBACK MENU | ||||
| Delete | Selected | Selected | Selected | Selected |
| Playback folder | ND800 (default) | ND800 (default) | ND800 (default) | ND800 (default) |
| Hide image | Default | Default | Default | Default |
| Playback display options | Highlights, RGB histogram, Overview | Highlights, RGB histogram, Overview | Highlights, RGB histogram, Overview | Highlights, RGB histogram, Overview |
| Copy image(s) | N/A | N/A | N/A | N/A |
| Image review | Off | Off | Off | Off |
| After delete | Show next | Show next | Show next | Show next |
| Rotate tall | Off | Off | Off | Off |
| Slide show | N/A | N/A | N/A | N/A |
| DPOF print order | N/A | N/A | N/A | N/A |
| MY MENU | ||||
| Shooting menu Bank | ||||
| Custom settings bank | ||||
| c3 Self-timer | ||||
| d4 Exposure delay mode | ||||
| ISO sensitivity settings | ||||
| Long exposure NR | ||||
| Active D-Lighting | ||||
Footnotes
*1 – Autofocus : I have started using the “AF-ON” technique (for lack of a better term) to focus my camera. You can read more about the technique here. You will see that in my settings, I primarily use AF-C as the default focus mode when I use the camera. With the AF-ON technique, you decouple the focusing of the camera from the shutter press. The nice thing is that you can have both continuous and static autofocus at the same time. Focus and recompose is also easier as you don’t have to keep the shutter half-pressed, just release the AF-ON button and the camera stops focusing. It works very well, but takes a bit of getting used to. This technique works on both Nikon and Canon cameras (likely other brands as well but I haven’t checked into it).
*2 – Image comment : There are two spots to put your personal info into the file EXIF data: “Image comment” and “Copyright information”. Some people use both, but there isn’t really a reason to do so. I have found one reason not to use the ‘image comment’ field, and that is because the comment shows up in the description field when you post images online (facebook for example). At times, I post images to facebook and I don’t want the description for each one to say “copyright 2013…”, blah, blah, blah. My friends want to see something about the image, not a copyright notice. For me, it just makes the upload process more time consuming and it doesn’t add any value. You may like it, so feel free to use the field if that fits into your workflow.
*3 – Set Picture Control : The live view of the Nikon D800 isn’t great, but I still use it at times to get sharp focus. I zoom in the live view display and manually focus the lens to the best setting. If you change the picture control to the highest sharpening level you actually get a better display. Since I almost always shoot in raw, this has no effect on the final image. You can edit your existing picture control but it’s best to create a new, custom, one. To make this easier, you can download a custom picture control I created called Live View Max Sharp. Unzip the file, you should see a “Nikon” folder, copy that to the top level (root) of your flash card and put the card into your camera. In the menu, go to SHOOTING MENU (camera icon)-> Manage picture control -> Load/save -> Copy to camera => Live View Max Sharp, click “OK”. Select one of the custom picture control spaces to use (C1..C9) and you are done. Now you still have all of your default picture controls plus the new one to pick from.
Related Posts
My New Camera, the Nikon D800E
February 11, 2012
Nikon D800 High ISO Test
April 30, 2012
Nikon D800 vs iPhone 4S
August 14, 2012


